
Xurrent IMR Support Portal: Your Complete Setup and Usage Guide
Last updated
As part of our ongoing evolution from Zenduty to Xurrent IMR, we’ve rebuilt how customers access help, documentation, and troubleshooting resources. The new Support Portal is designed to make your experience faster, more intuitive, and more efficient, so your team gets the answers and assistance it needs without delay.
Whether you want to set up your profile, raise a support ticket, or explore our self-service knowledge base, this guide walks you through each step clearly.
How to Set Up Your Xurrent IMR Support Portal Profile
Before you can start using the Support Portal, you’ll need to set up your user profile. You can do this by registering directly through the portal.
Setting Up Your New User Profile
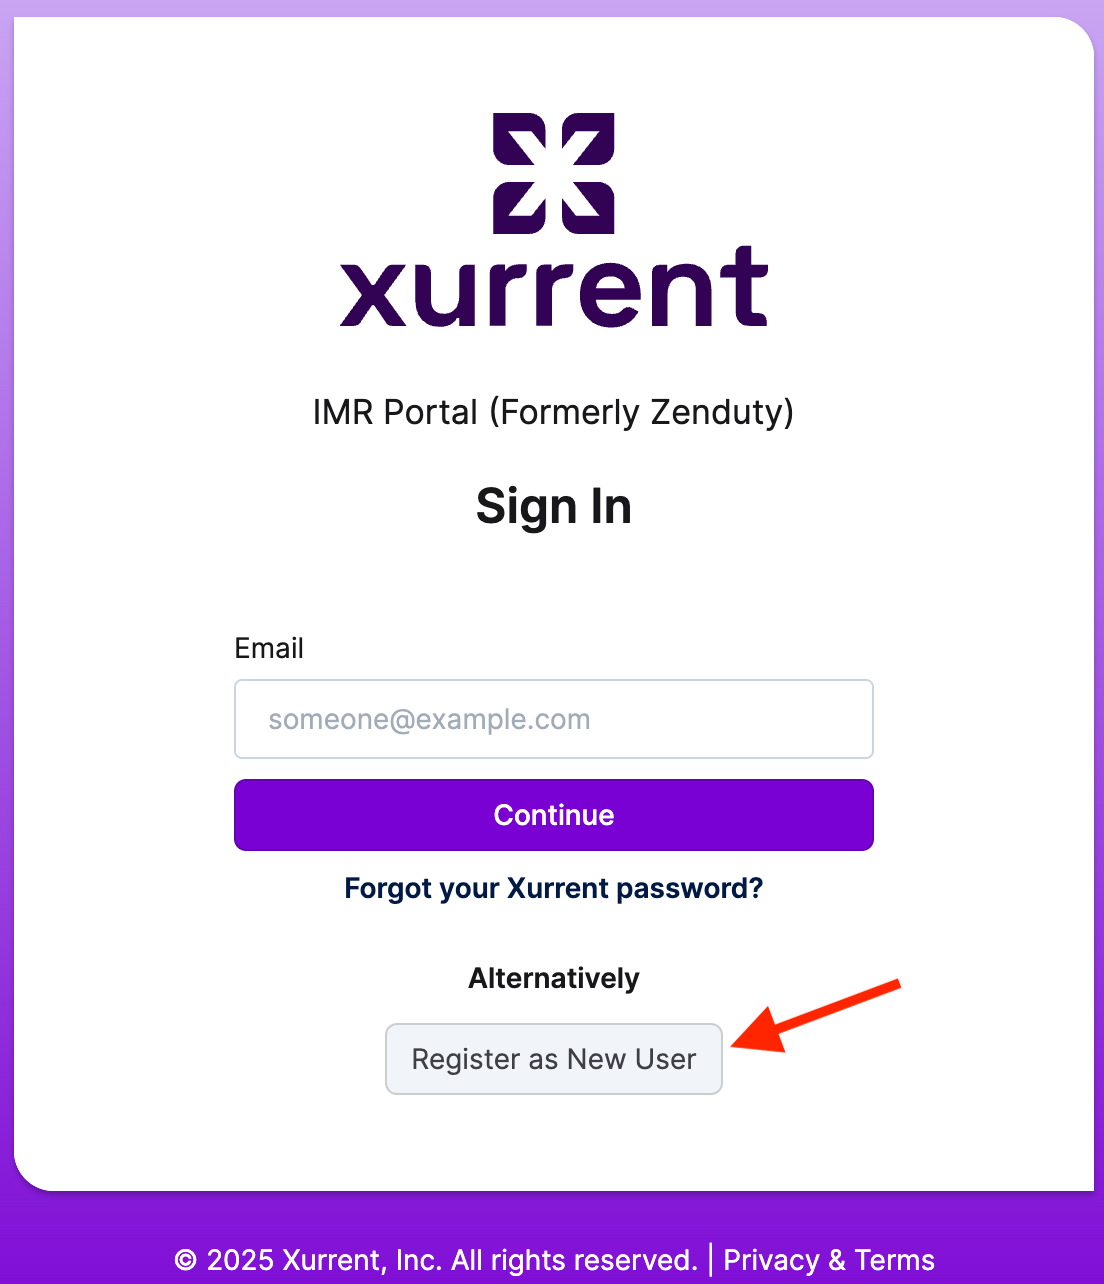
Step 1: Head to the Xurrent Support Portal
The first step is to navigate to the registration page.
- Click on the following link to open the portal:
Step 2: Start Your Registration
Once the portal homepage loads, you'll need to indicate that you're a new user.
- Locate and click on the “Register as New User” link.
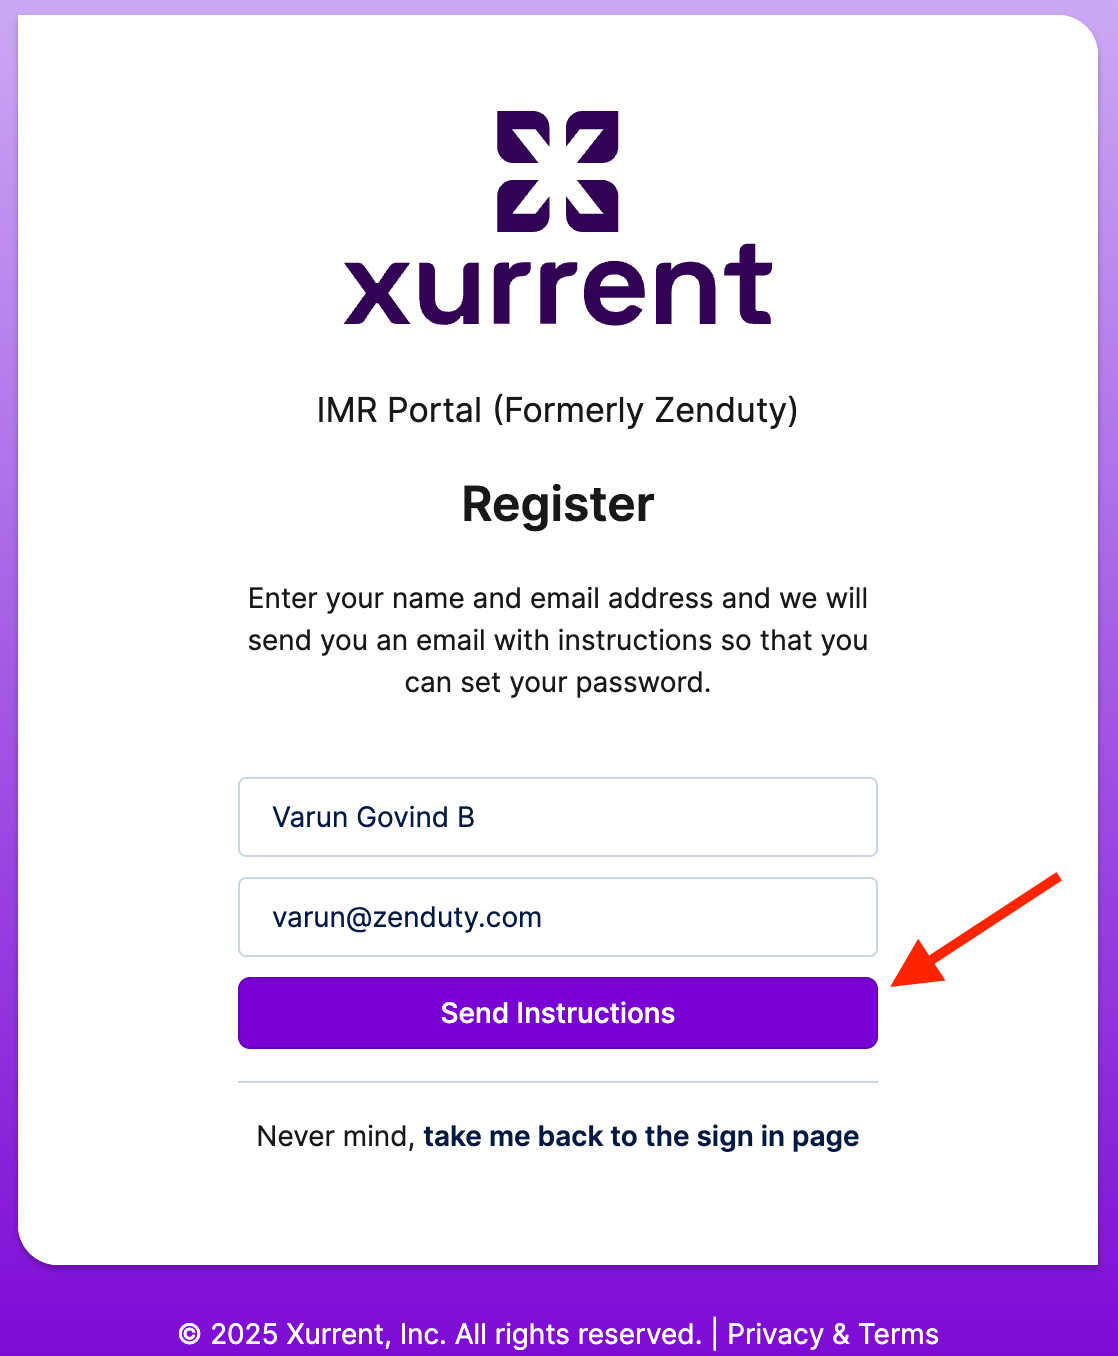
Step 3: Enter Your Account Information
To verify your IMR Account.
- Enter your Full Name and the Email ID that you used to register for your IMR Account.
- Click “Send Instructions”.
Step 4: Email Sent Confirmation
After clicking 'Send Instructions' you will receive confirmation that the next steps have been sent to your email.
- You will see a prompt confirming that an email with instructions for setting your password has been successfully sent.

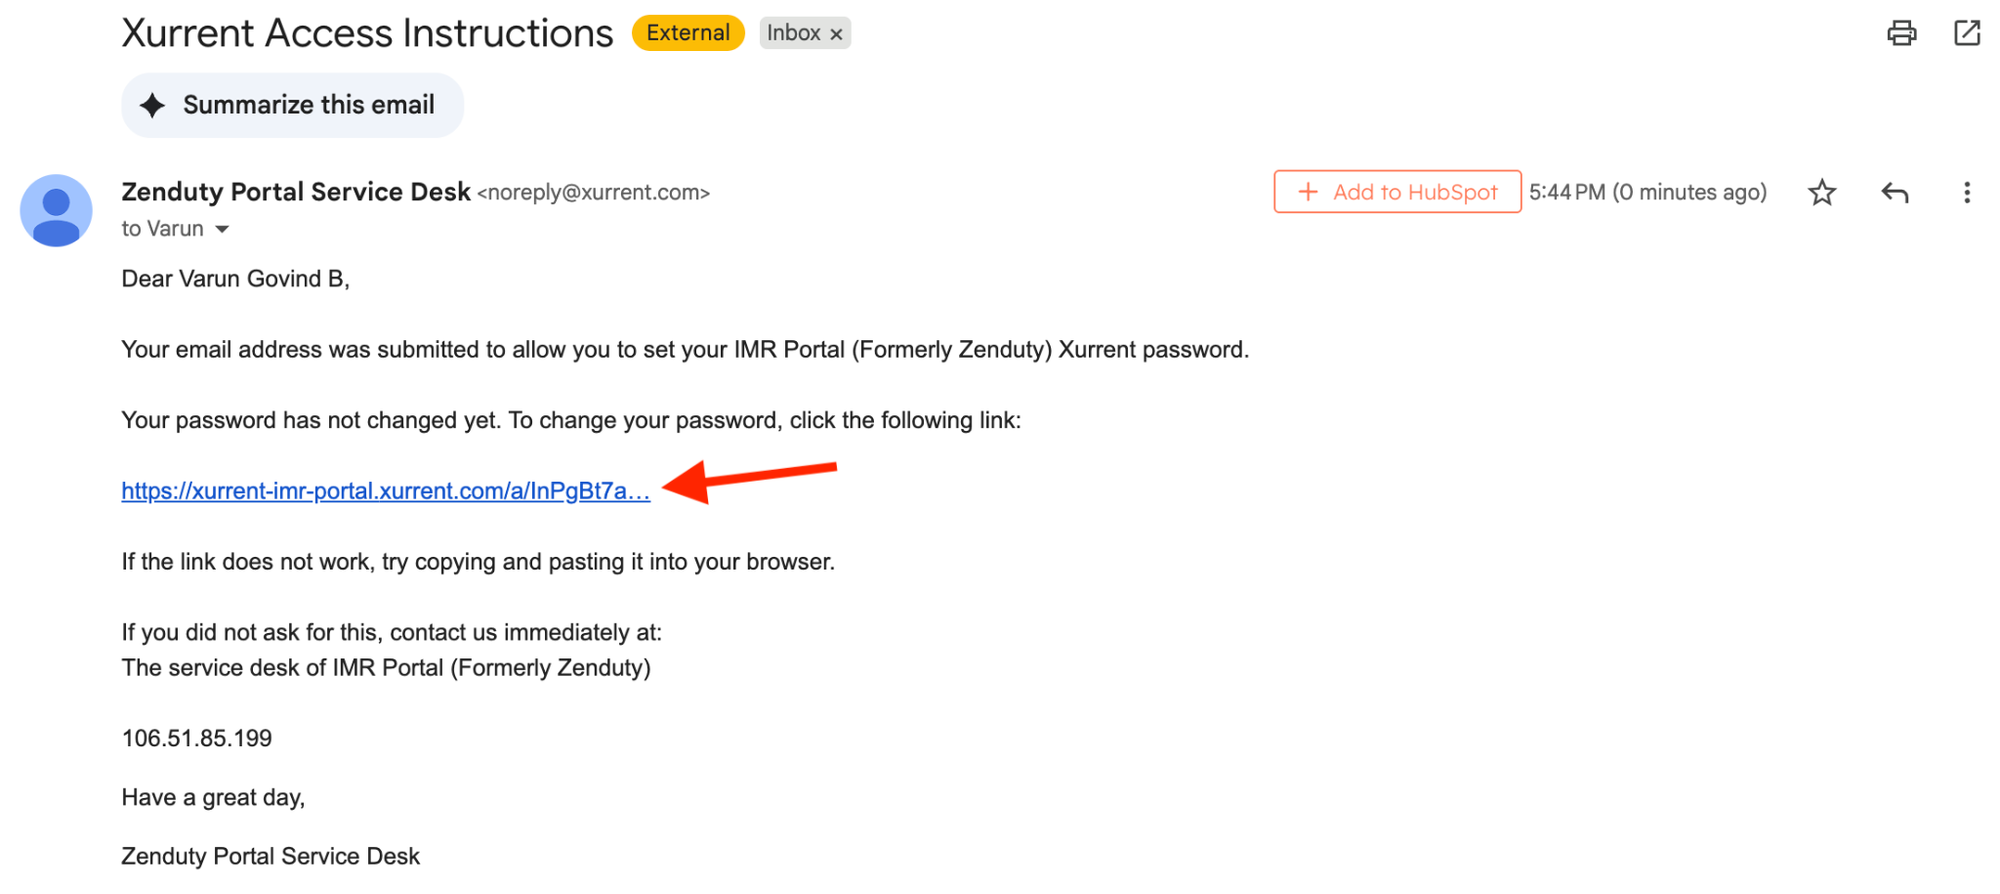
Step 5: Follow the Email Link
Head over to your email inbox and look for the message from the Xurrent Support Portal.
- Click on the link you received in your email to be redirected to the "set your password" page.
Step 6: Set Your Password
- Read the password policy (the rules for creating a secure password).
- Enter your desired new password.
- Click “Continue”.

Step 7: Log In!
- You will see a final success message confirming your password is successfully changed.
You can now log in to the portal using your Email ID and the new password you just set!
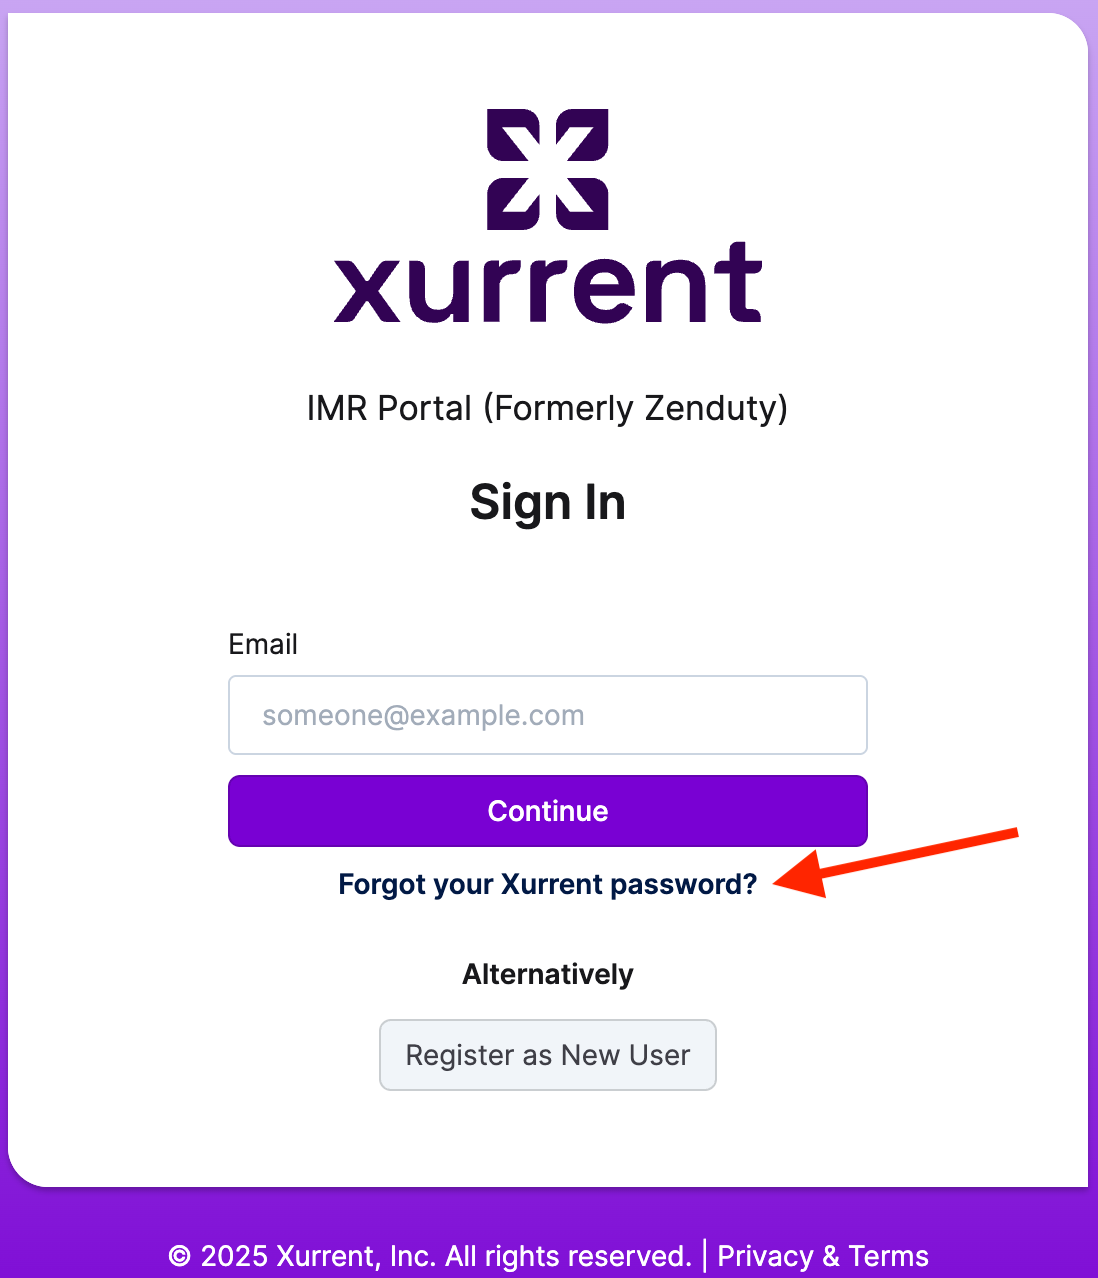
Reset Your Password
Step 1: Head to the Xurrent Support Portal
The first step is to navigate directly to the registration page.
Click on the following link to open the portal:
https://xurrent-imr-portal.xurrent.com/Step 2: Initiate the 'Forgot Password' Process
This action brings up the email submission form required to reset your credentials.
On the main page, click the prompt: “Forgot your Xurrent Password?”
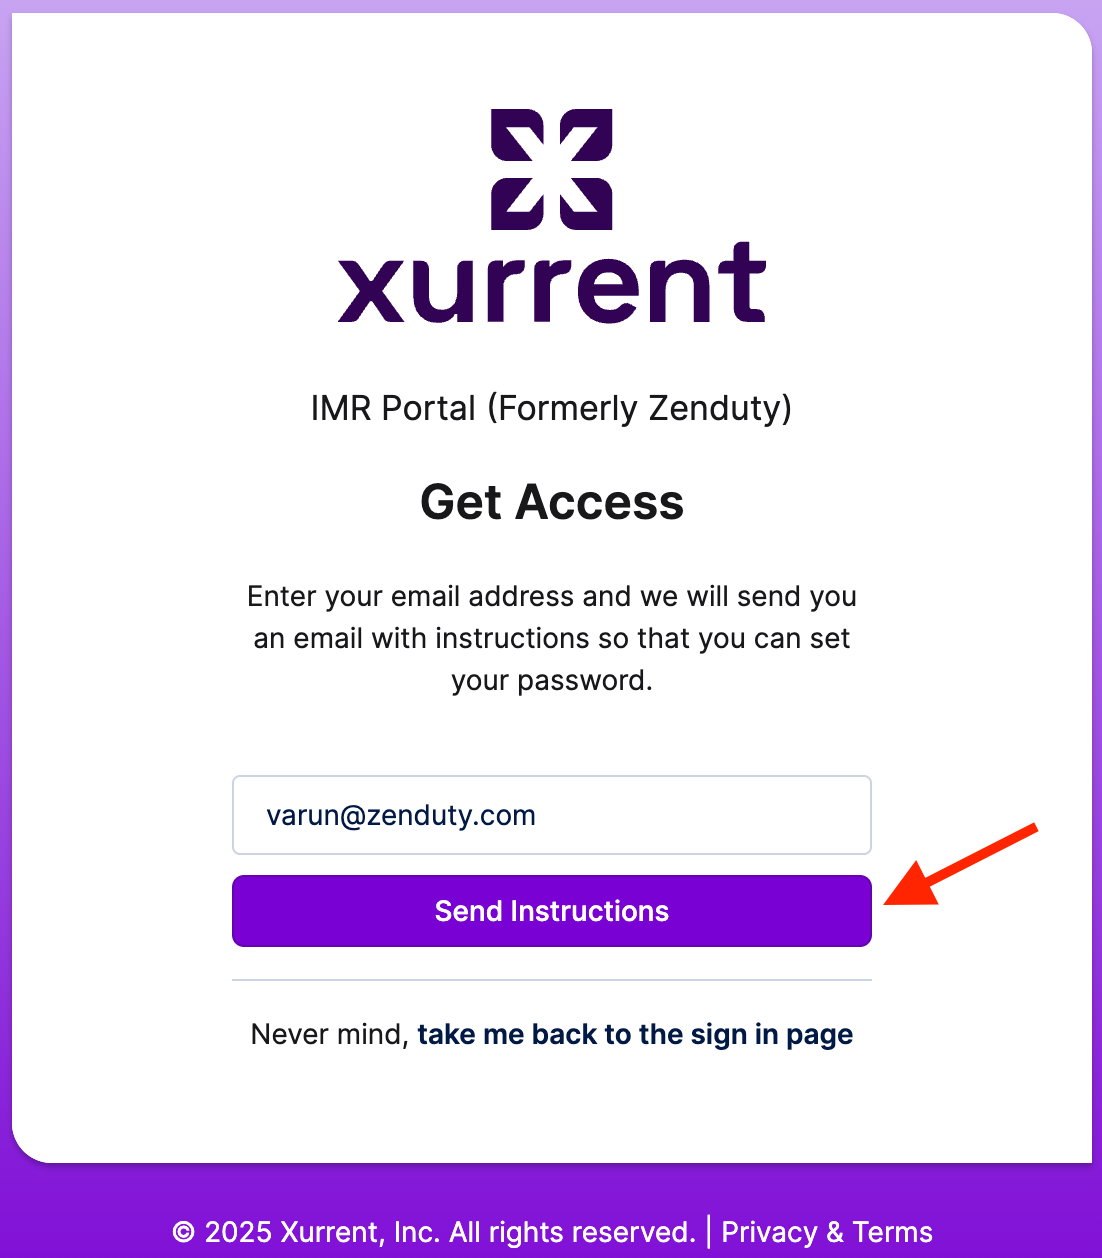
Step 3: Enter Your Email and Request Instructions
The system needs to verify who you are and where to send the reset link.
Enter your registered email address.
Click on “Send Instructions.”
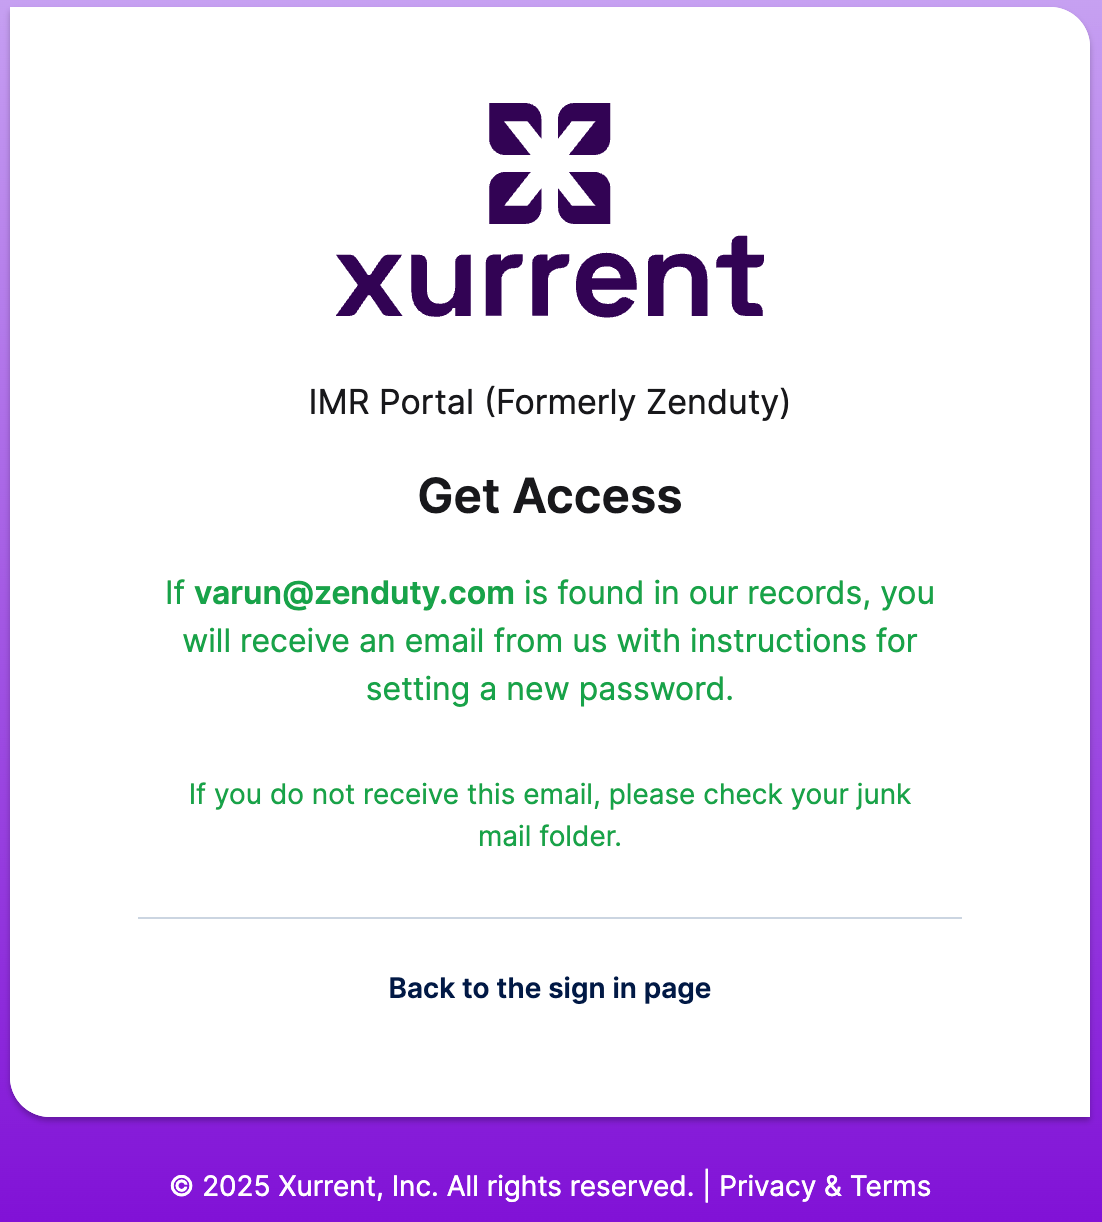
Step 4: Confirmation and Email Delivery
After submitting your email, look for the on-screen confirmation.
You will see a prompt displaying your email address (if it is found in our records), confirming that the reset instructions have been shared with your email inbox.
Step 5: Click on the Reset Link in Your Email
Check your email (and your spam/junk folder, just in case!).
Open the email from Xurrent Support and click on the unique password reset link provided.

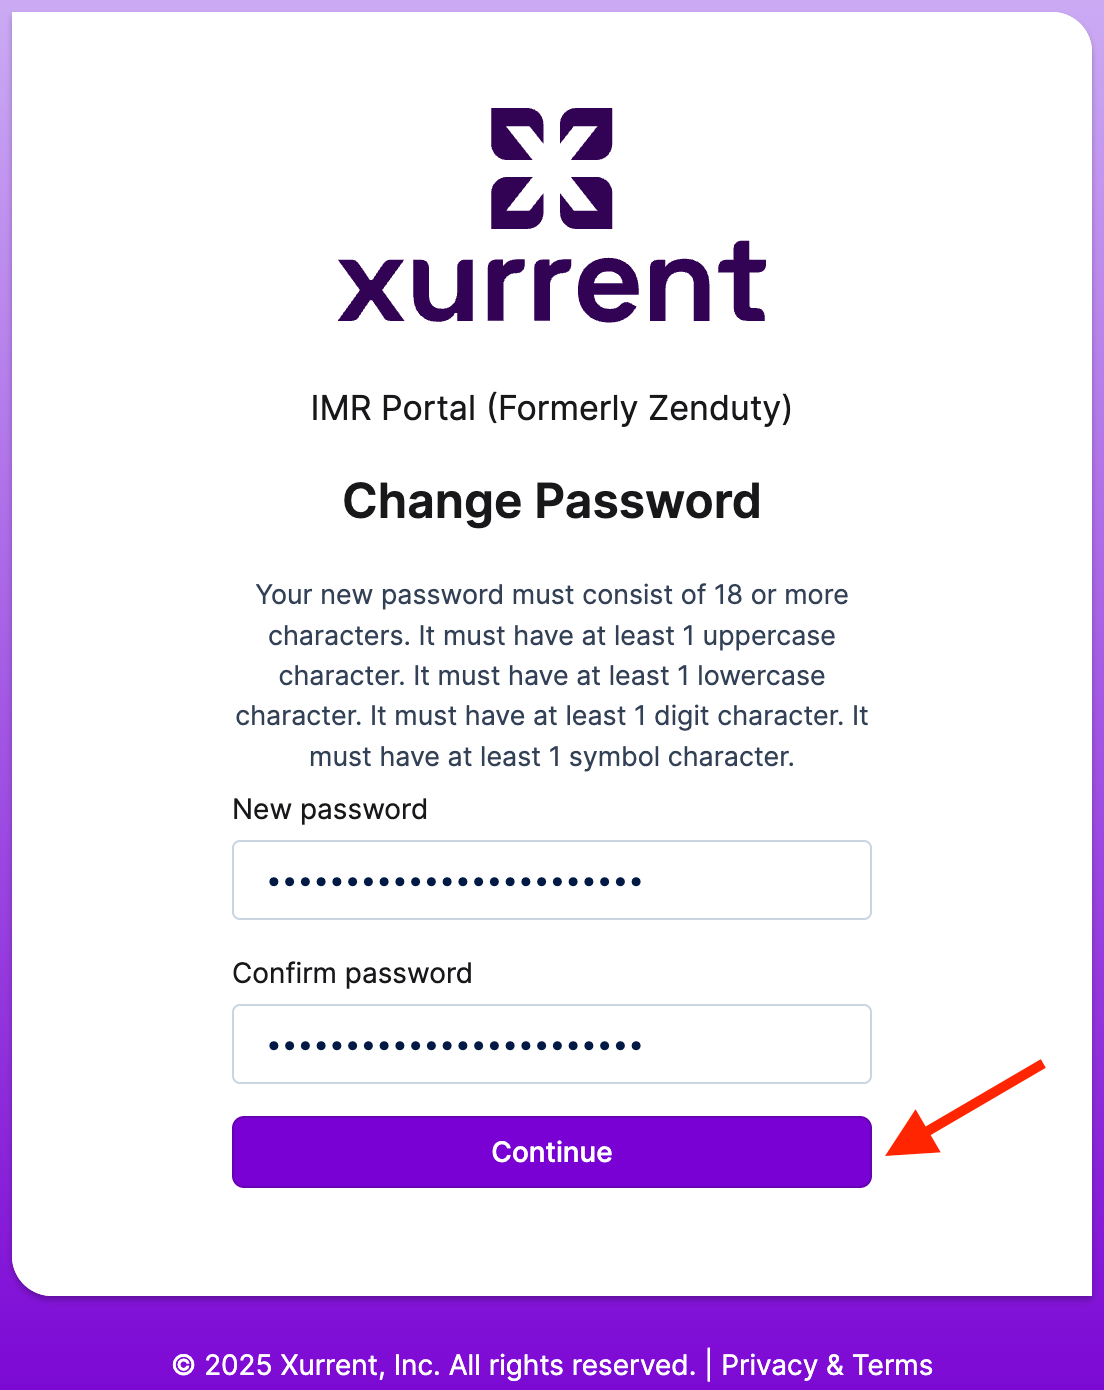
Step 6: Enter Your New Secure Password
The reset link will take you to a dedicated password change page.
- Enter your new password twice, ensuring it adheres to the password policy mentioned on the screen.
- Click “Continue.”
Step 7: Password Successfully Updated & Redirect to Homepage
You did it! Your password is now updated and secure.
- Once the password change is finalized, you will be automatically redirected to the homepage of the support portal. You are now ready to access the portal using your new credentials.
Utilizing the Xurrent Support Portal: A User Guide
This document provides comprehensive, step-by-step instructions designed to guide authorized personnel through the process of effectively utilizing the Xurrent Support Portal. Following the successful generation of your user profile, this guide will ensure you can efficiently submit support requests, leverage the available self-service knowledge base, and track the status of your inquiries.
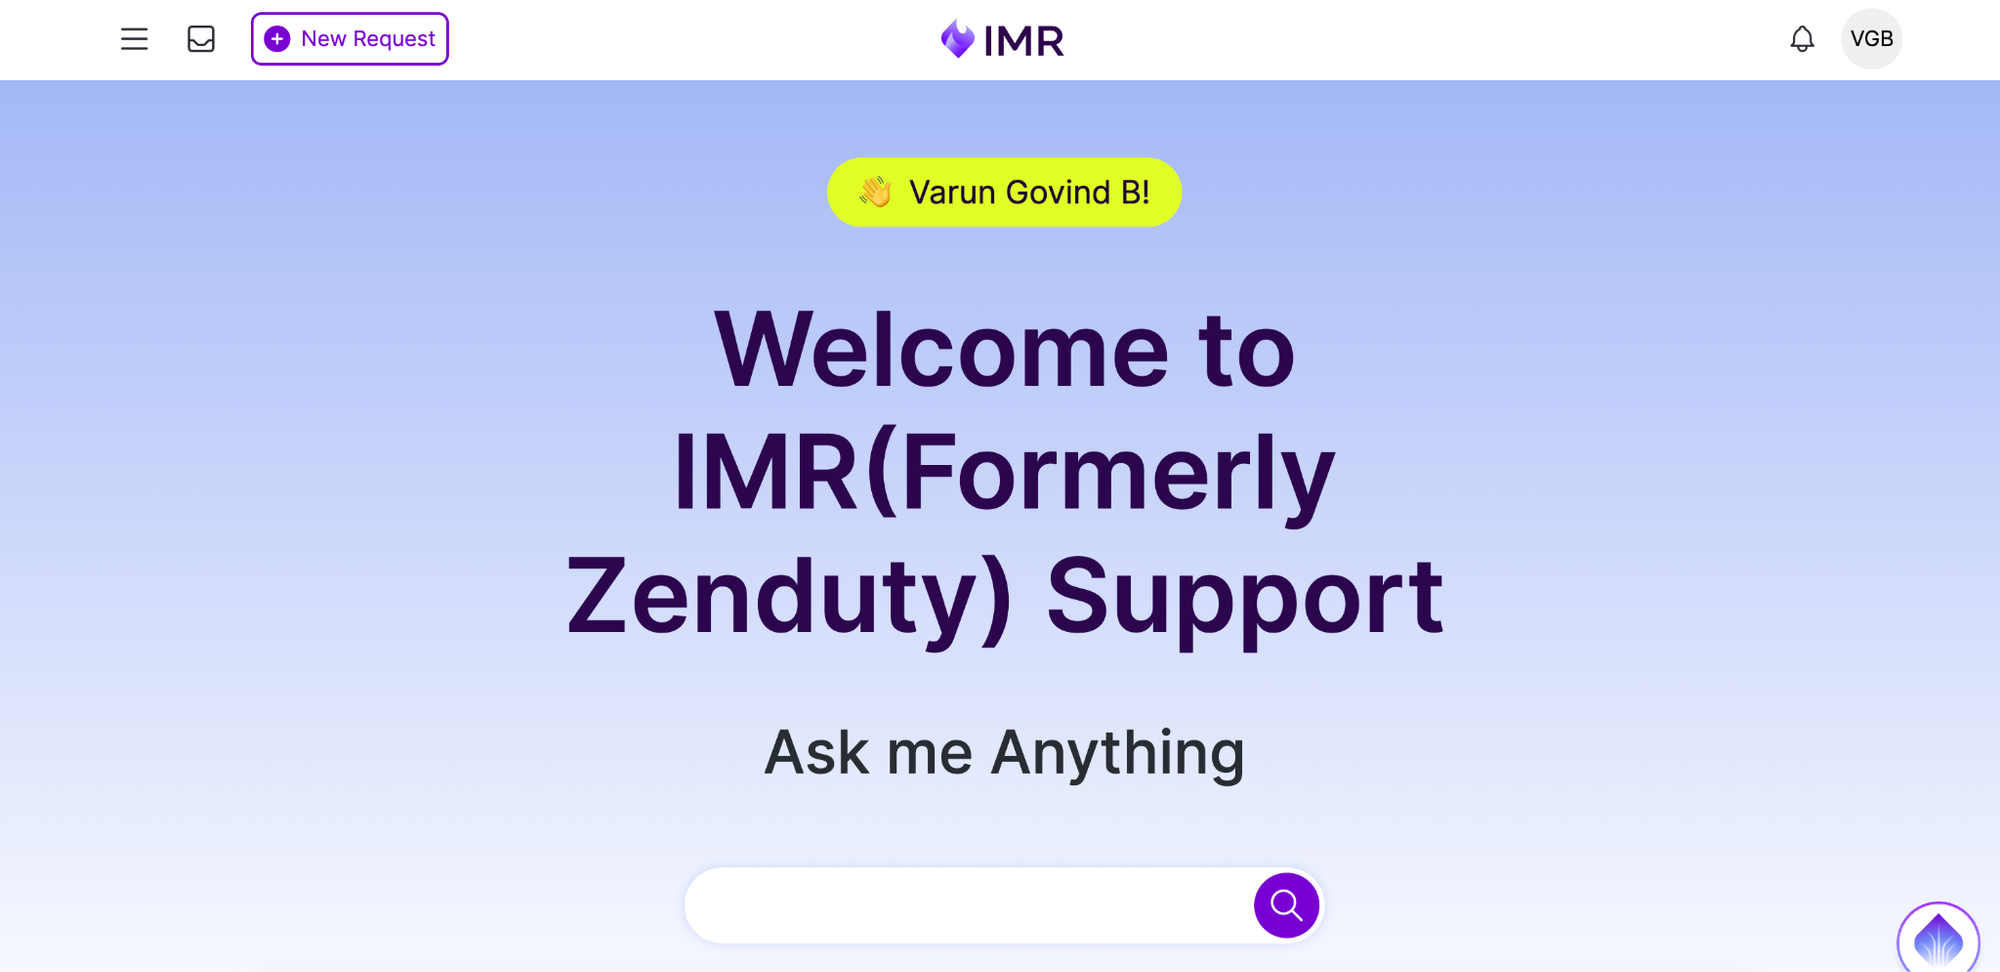
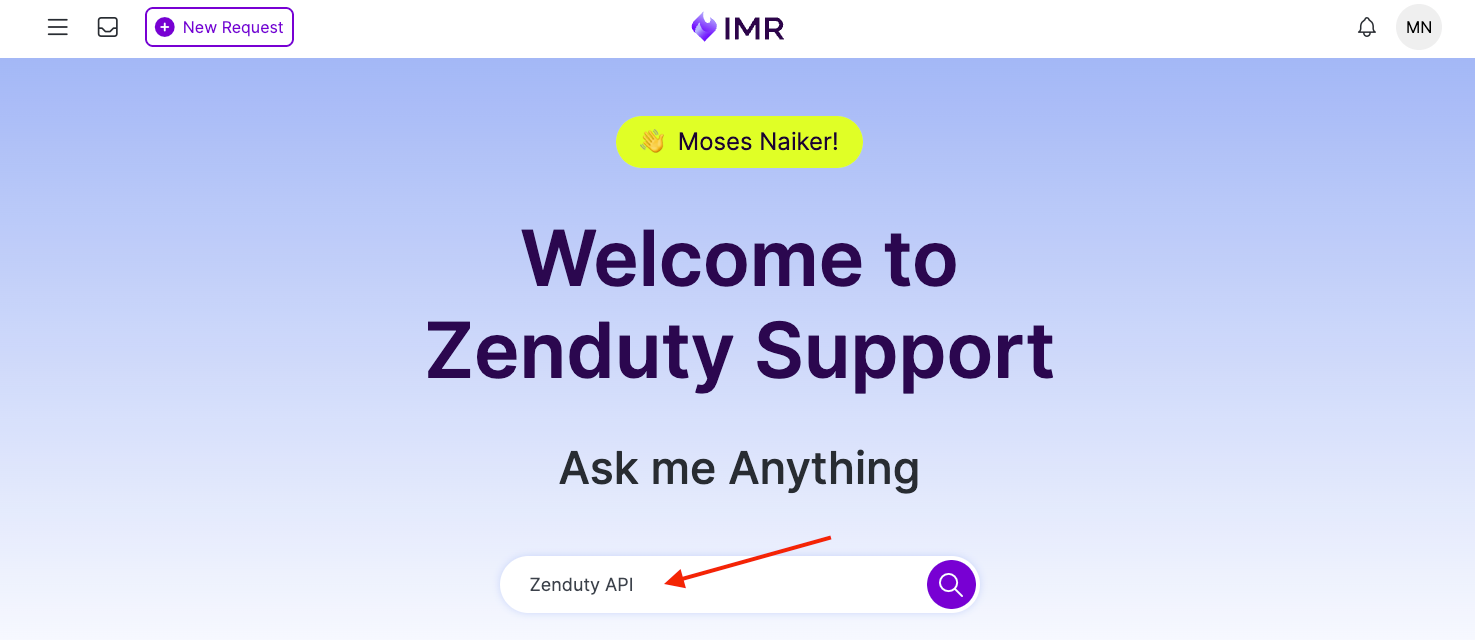
1. Portal Navigation and Homepage Overview
Upon logging into the Xurrent Support Portal, users are directed to the personalized homepage. This central interface is structured to provide rapid access to key functionalities. Users are encouraged to familiarize themselves with the arrangement of the core widgets, which are strategically positioned to optimize the support experience.
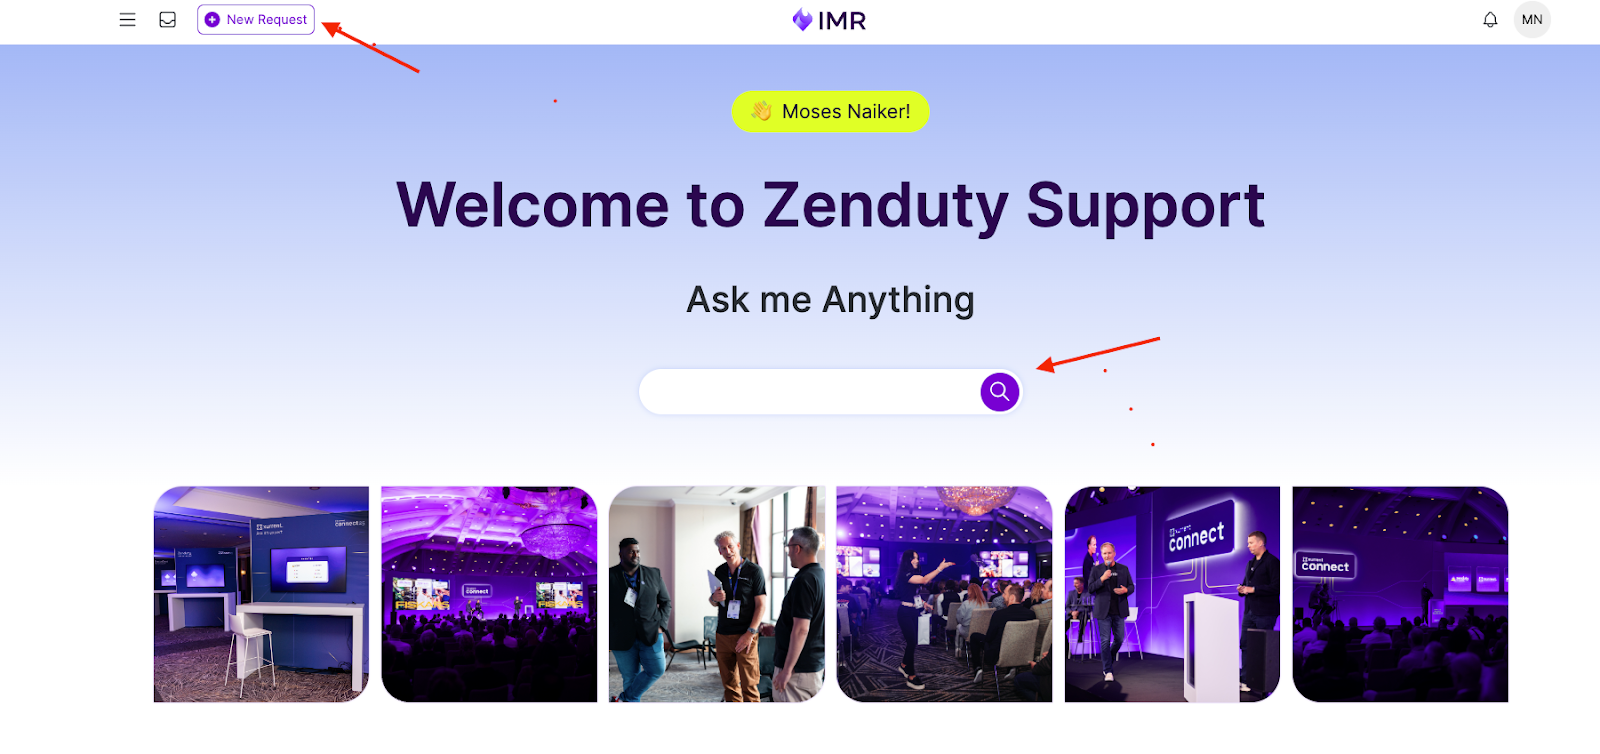
2. Submitting a New Request via the "Add Request" Widget
The "Add Request" widget serves as the formal channel for initiating new support tickets and communicating requirements to the Xurrent support team. Precise utilization of this feature is essential for accurate categorization and expedited routing.
Request Submission Protocol:
- Locate the Widget: Identify and select the "Add Request" widget on the portal homepage.
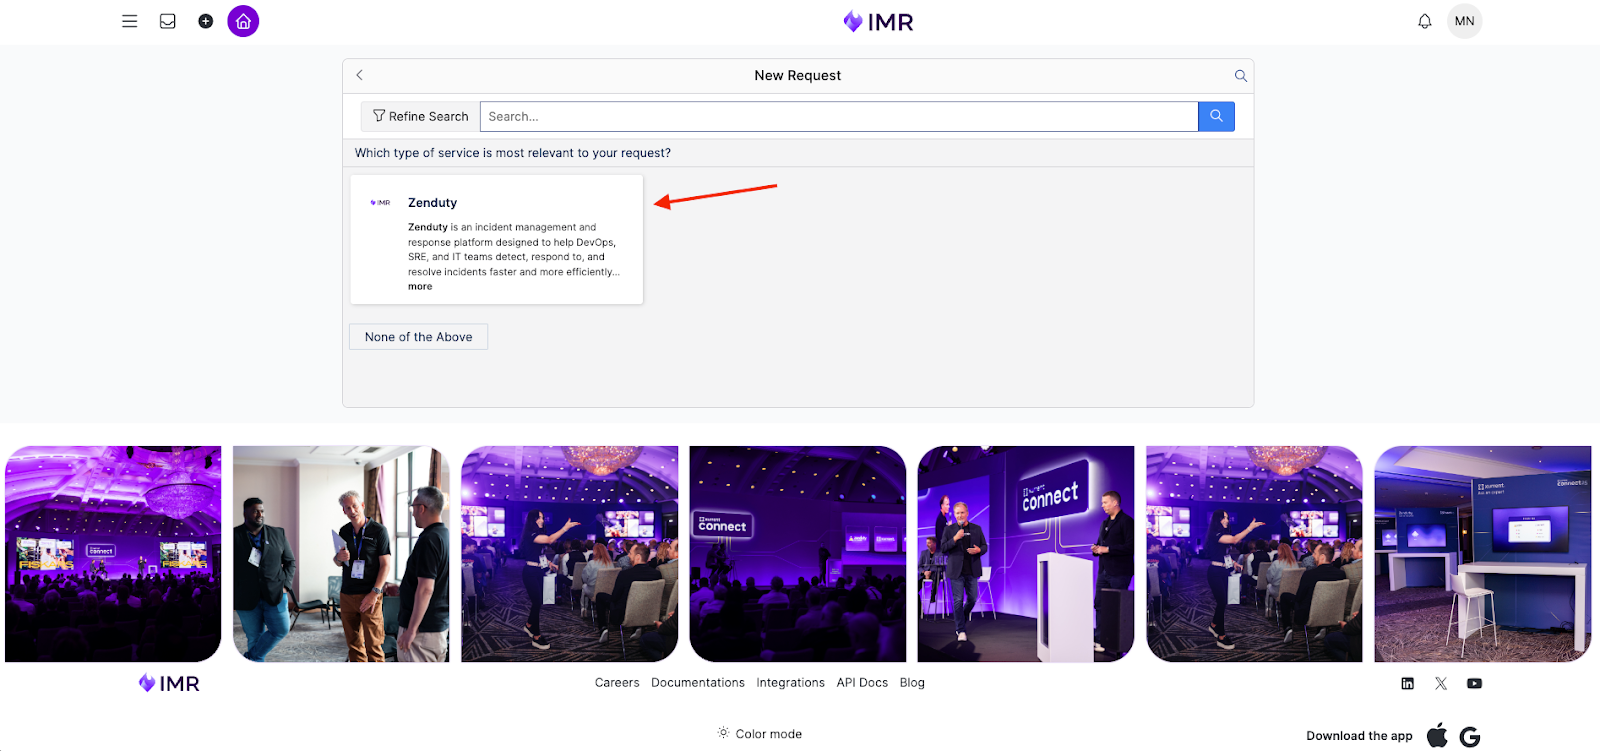
- Service Selection: A dropdown menu will prompt the selection of the relevant service. It is mandatory to select "Zenduty Service" for all inquiries pertaining to Zenduty functionality, operation, or issues. This action ensures correct routing to the specialized Zenduty support team.
- Template Selection: Following service selection, predefined request templates are presented. Selection of the most appropriate template is critical for capturing all necessary information:
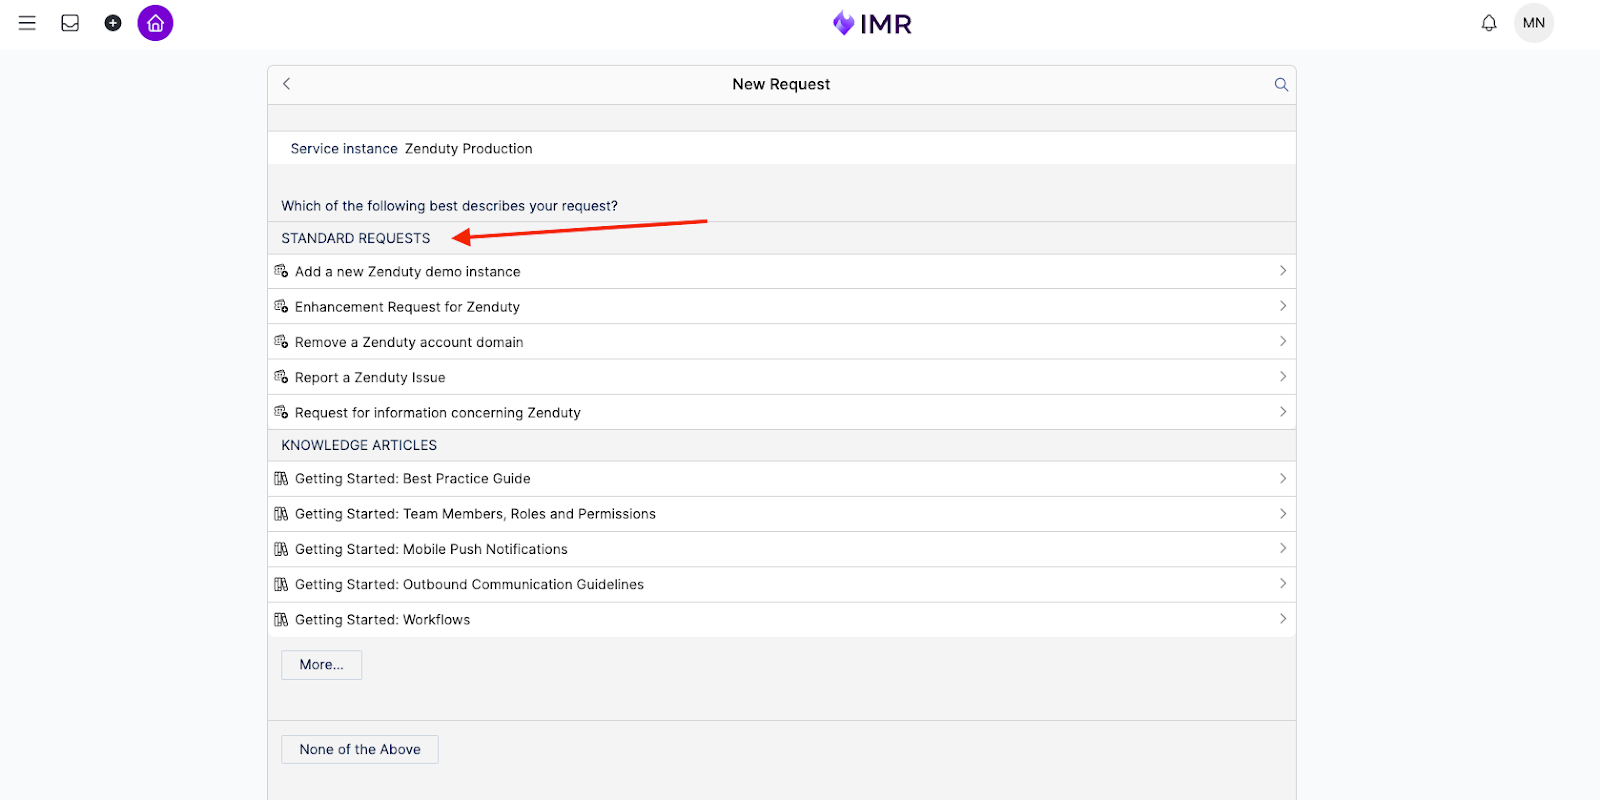
- Incident: To be utilized when reporting a current disruption, system error, unexpected software behavior, or critical malfunction that affects service or workflow functionality.
- Required Data: Designation of Urgency (e.g., "Immediate," "Within 4 hours"), a detailed Description of the incident, steps to reproduce the issue, and documentation of any preliminary troubleshooting executed.
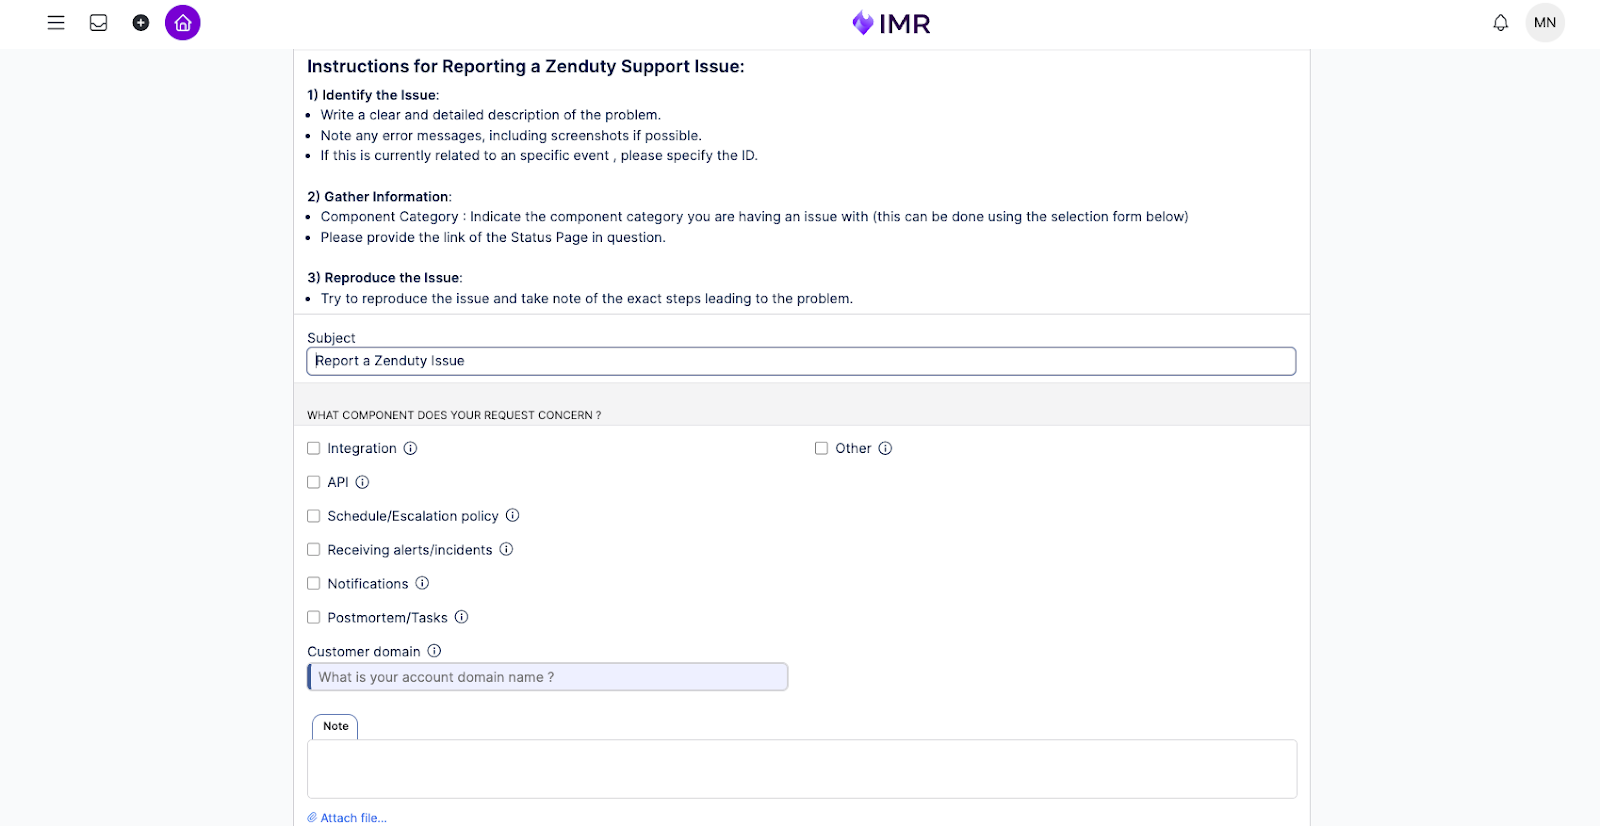
- Request for Information: Employed for seeking clarification, asking non-disruptive questions, or requesting specific knowledge related to a Zenduty service, feature, or system operation.

- Enhancement Request: Reserved for submitting formal suggestions for improvements to existing Zenduty features or functionalities. The submission must clearly articulate the proposed change, its intended function, and the demonstrable benefits it would deliver.
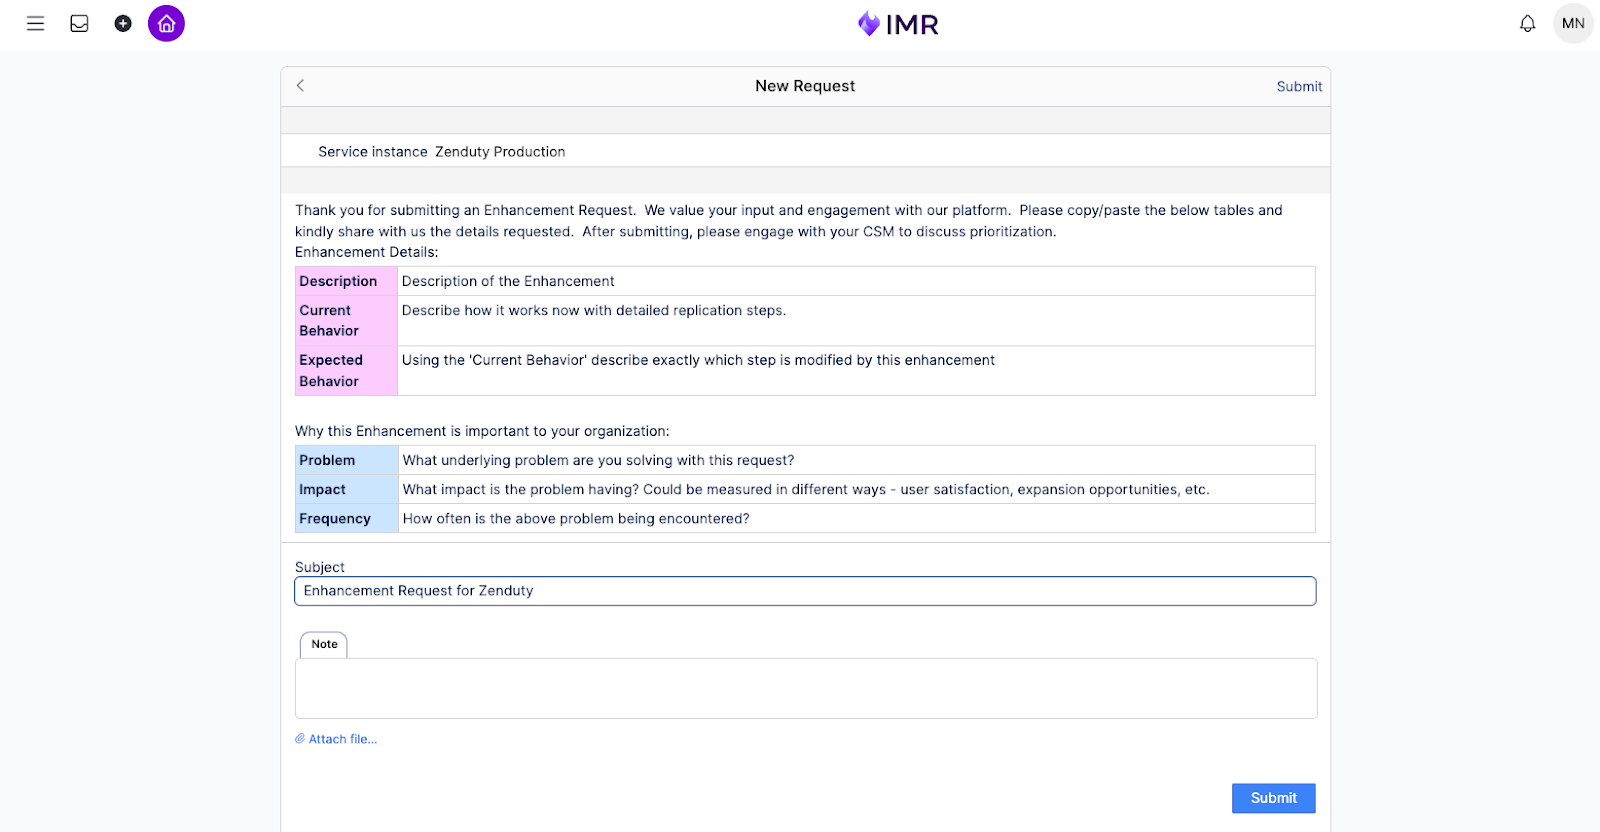
- Form Completion: All fields designated as mandatory (indicated by an asterisk *) must be completed. Users are required to provide comprehensive detail in all descriptive fields. Supporting documentation, such as screenshots or log files, should be attached where applicable to facilitate resolution.
- Formal Submission: Click the "Submit" button. A confirmation message, inclusive of a unique reference number, will be issued upon successful submission. This number must be retained for tracking and all subsequent communication concerning the request.
3. Leveraging the "Knowledge Articles" Widget
The "Knowledge Articles" widget represents a valuable resource for self-service support. It provides access to a comprehensive library containing FAQs, technical guides, troubleshooting protocols, and established best practices. Users are advised to consult this resource prior to submitting a new support request.
Accessing the Knowledge Base:
- Locate the Widget: Select the "Knowledge Articles" widget on the portal homepage.
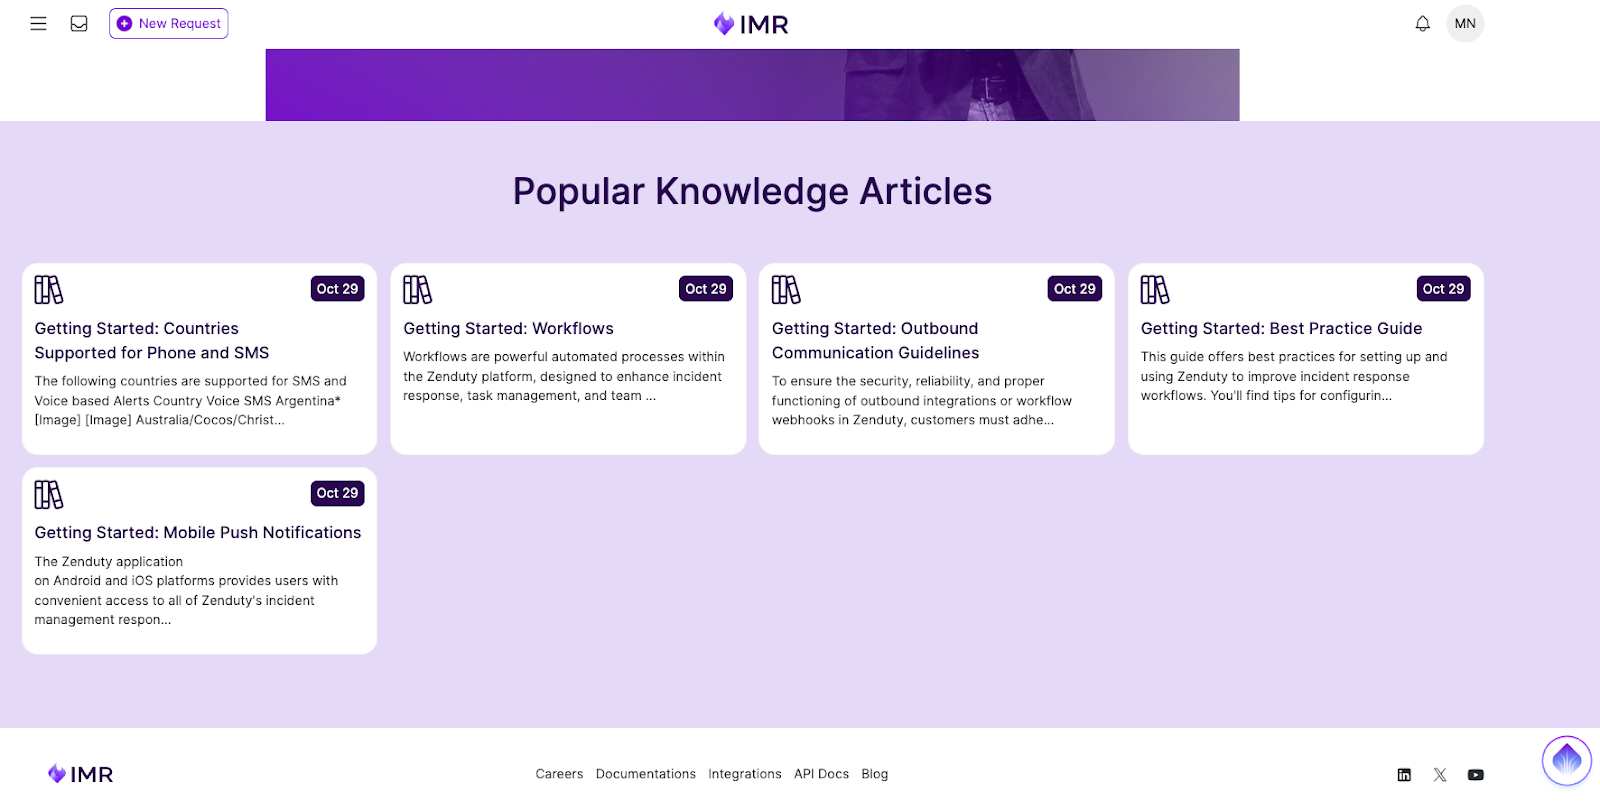
- Information Retrieval: Two primary methods are available for locating information:
- Search Bar: Utilize the search bar for targeted queries by entering specific keywords (e.g., "Zenduty API," "on-call scheduling").
- Browse Categories: Navigate through the systematically organized categories (e.g., "Troubleshooting Zenduty," "Integrations") to explore broader subject areas.
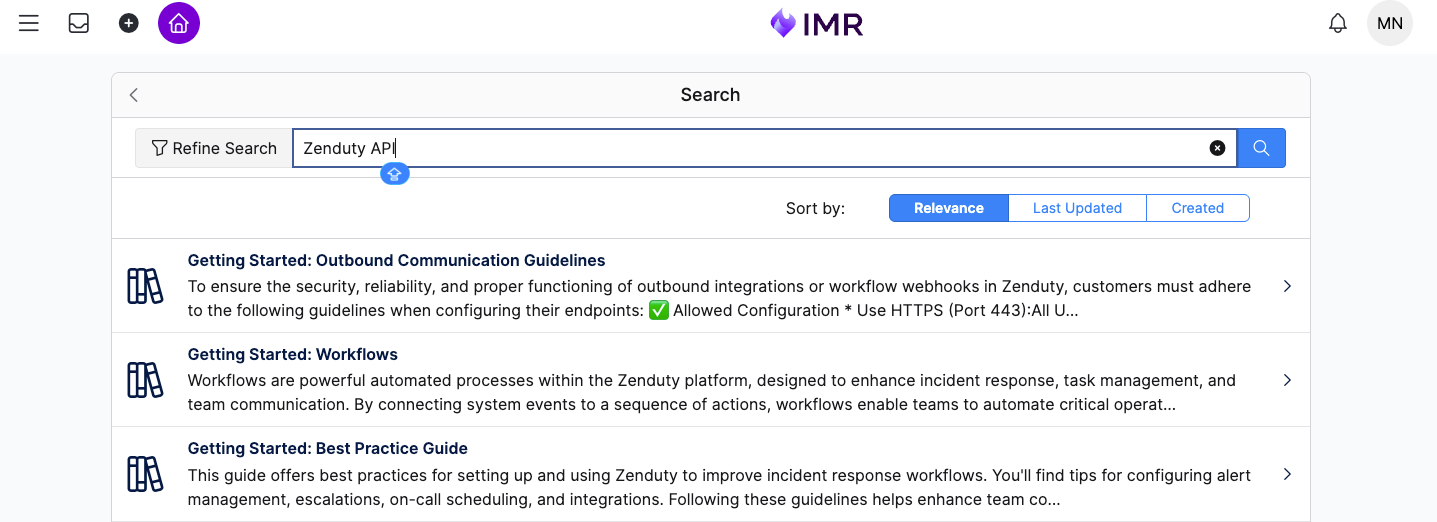
- Content Review: Select the relevant article title to access the full content. Articles are structured to deliver clear, concise information and may offer an immediate resolution, negating the need for ticket submission.
This guide ensures that all end-users possess the necessary instructions to utilize the Xurrent Support Portal efficiently and formally.
Need More Help?
If you ever need additional assistance or face an issue that’s not covered in this guide, our team is always here to help.
You can reach us anytime by emailing support@zenduty.com. Our support specialists will get back to you quickly to make sure your issue is resolved and you’re back on track.
We’re excited about the journey ahead and grateful for your continued trust.
With every change we make, our goal remains the same — to keep you supported, informed, and confident in your incident management experience.
Thank you for being part of this journey with Xurrent IMR (formerly Zenduty).
💜 The Xurrent IMR Team
Varun Govind B
Along with Rohan Taneja
