ServiceNow Bi-Directional Integration Guide
This guide walks you through setting up a secure, two-way connection between Zenduty and ServiceNow. Once connected, incidents in either platform will stay in sync, ensuring your teams have real-time visibility and control.
Before You Begin
You’ll need access to both:
- GitHub (to download the integration code)
- ServiceNow (admin permissions required)
We’ll set up a few things in GitHub first, then in ServiceNow, and finally connect them inside Zenduty.
Prepare GitHub
1.1 Create a Personal Access Token
- Sign in to GitHub.
- Go to Profile (top right) → Settings → Developer settings → Personal access tokens → Tokens (classic).
- Click Generate new token → Generate new token (classic).
- Name it something clear (e.g.,
ServiceNow Integration). - Select the following permissions:
- ✅ repo
- ✅ admin:repo_hook (optional but recommended)
- Click Generate token.
- Copy the token somewhere safe — you won’t see it again.
1.2 Fork the Integration Repository
- In GitHub, search for:
Zenduty/zenduty-servicenow. - Open the repository.
- Click Fork (top right).
- You’ll now have your own copy at:
https://github.com/<your_username>/zenduty-servicenow
Prepare ServiceNow
2.1 Switch to the Global Scope
- Log in to your ServiceNow instance as an admin.
- Open:
https://<your_instance>.service-now.com/now/nav/ui/classic - Click the sphere icon in the top-right → Application Scope → Global.
2.2 Add GitHub Credentials to ServiceNow
- Go to:
https://<your_instance>.service-now.com/discovery_credentials_list.do - Click New → Basic Auth Credentials.
- Fill in:
- Name: GitHub Integration Credential
- User Name: Your GitHub username
- Password: The GitHub token you created in Step 1.1
- Save.
2.3 Allow Access to Required Tables
For each of these tables:
incidentsys_user_groupcmdb_cisys_journal_field
Do this:
- Open the table (via
https://<your_instance>.service-now.com/sys_db_object_list.do). - Under Application Access:
- ✅ Can read
- ✅ Can create
- ✅ Can update
- ✅ Allow access via web services
- ✅ Allow configuration
- Under Controls:
- ✅ Extensible
- Click Update.
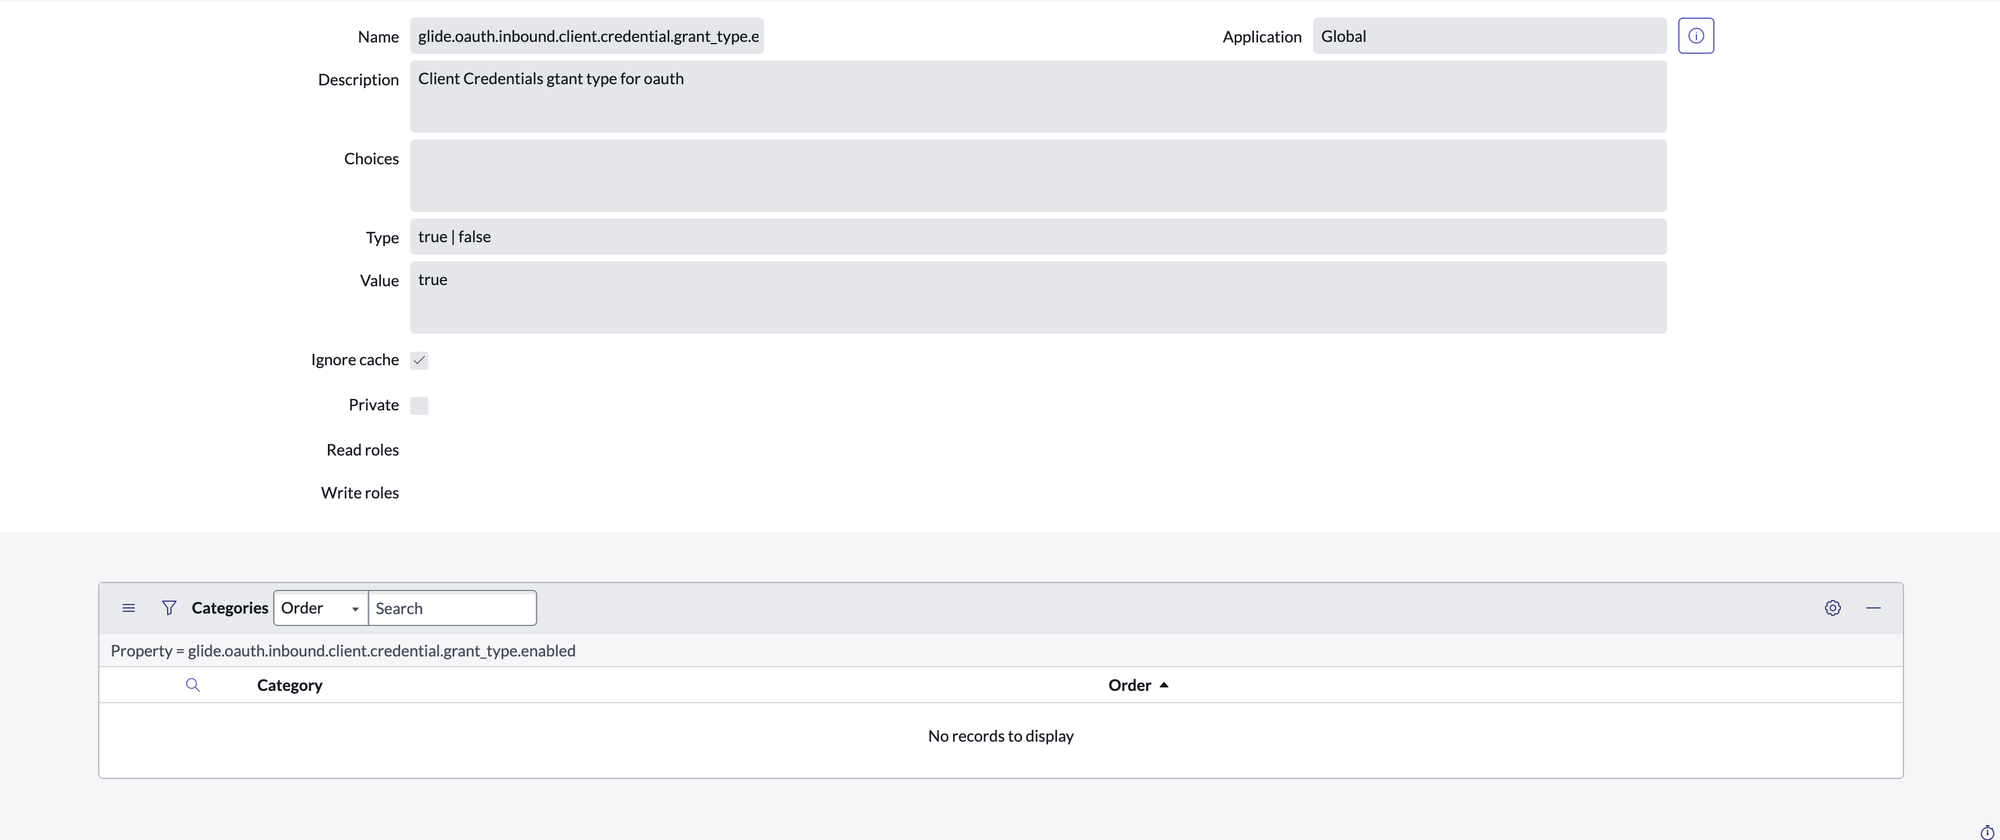
2.4 Enable OAuth Client Credentials
- Go to:
https://<your_instance>.service-now.com/sys_properties_list.do - Search for:
glide.oauth.inbound.client.credential.grant_type.enabled - If it exists → set Value to
true. - If it doesn’t exist → create it:
- Name: glide.oauth.inbound.client.credential.grant_type.enabled
- Type: true/false
- Value: true
- Ignore cache: checked
- Save.
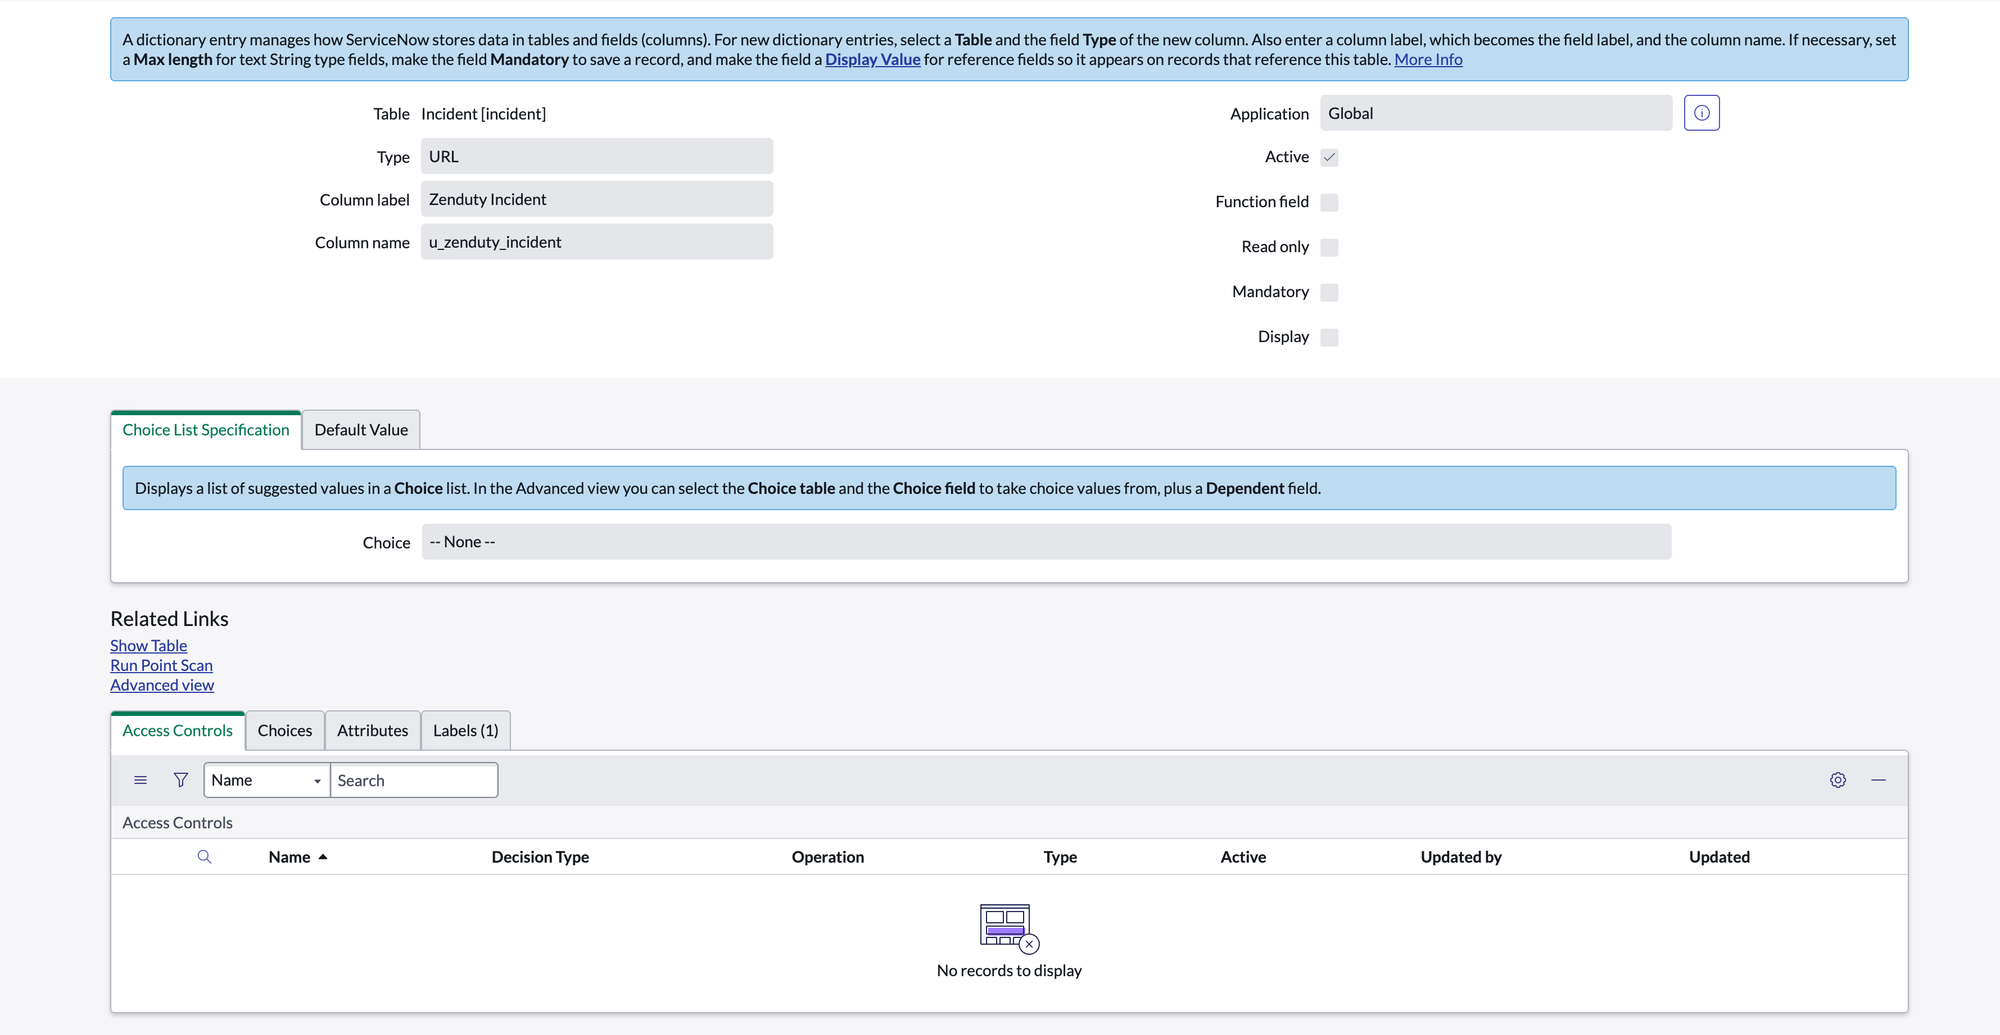
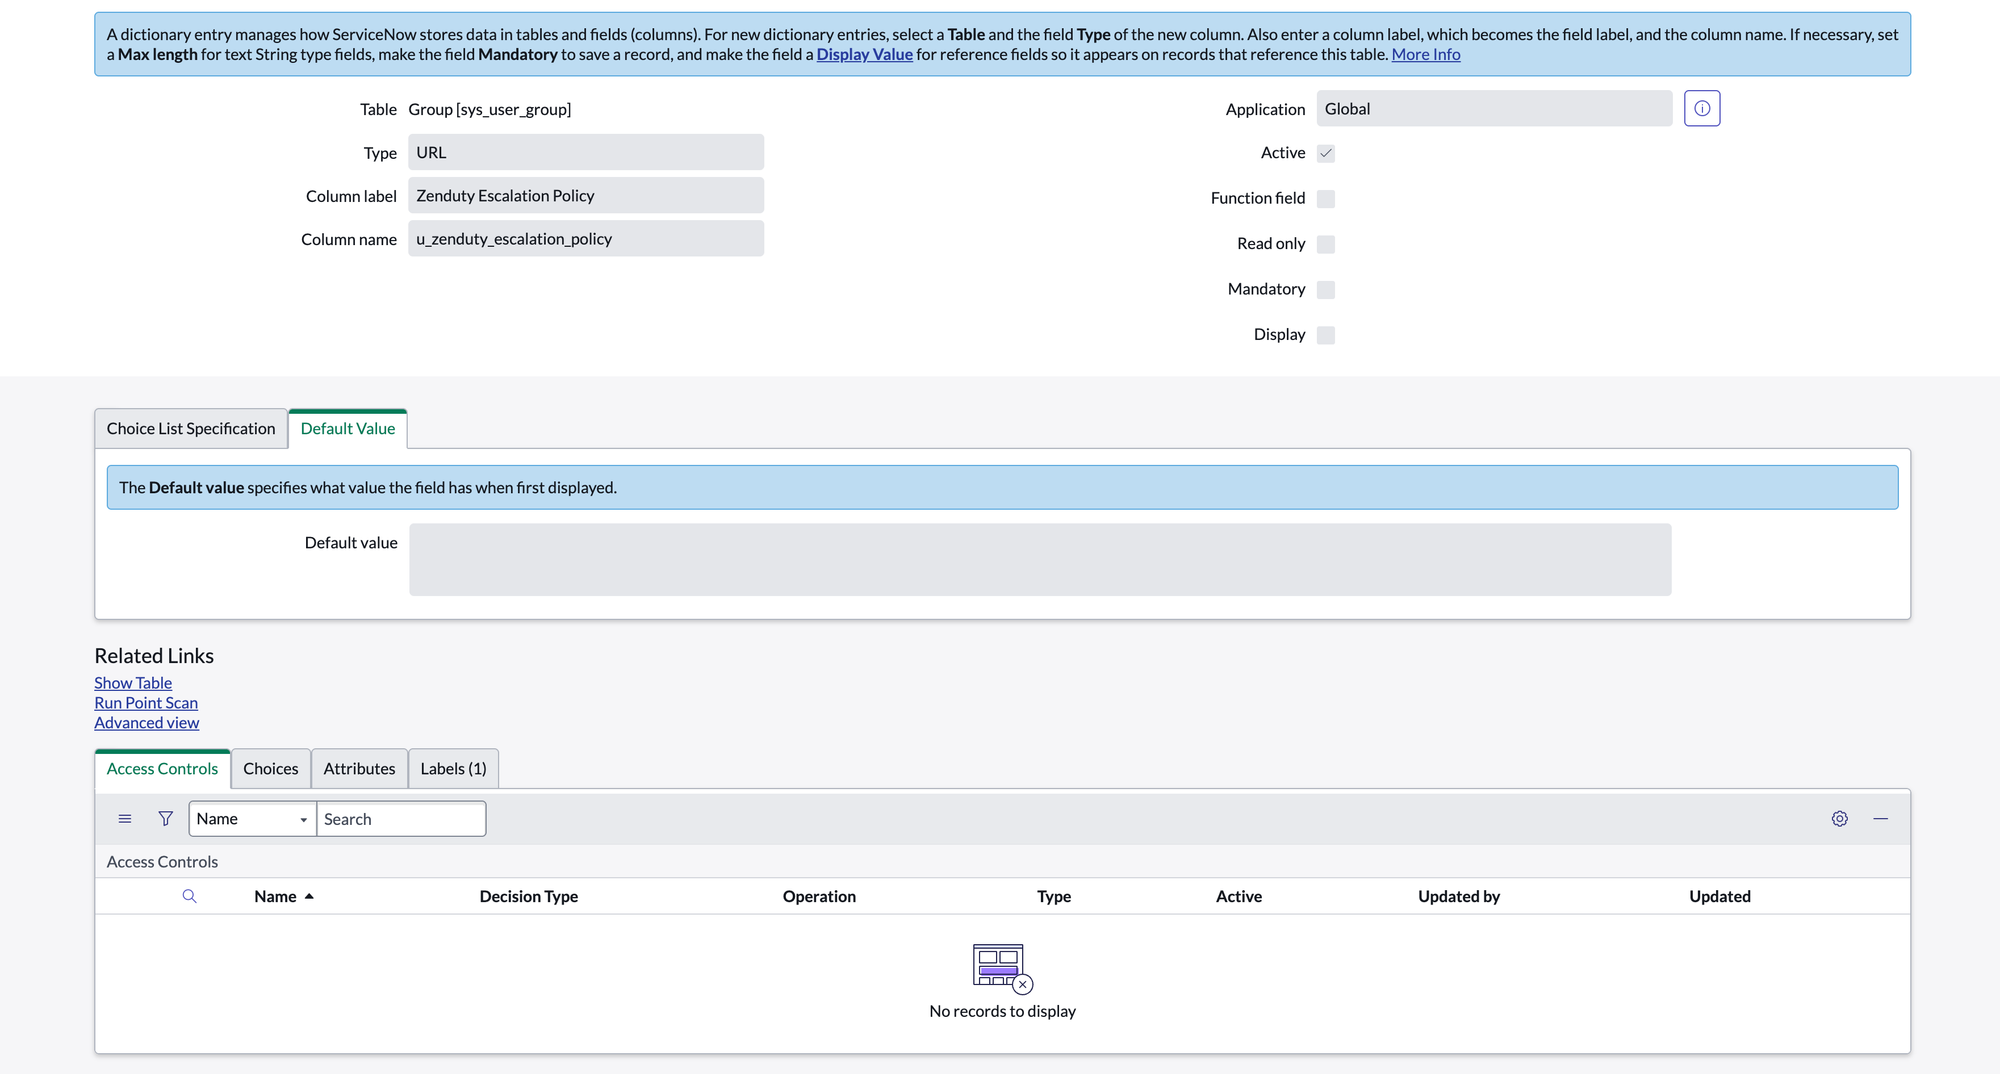
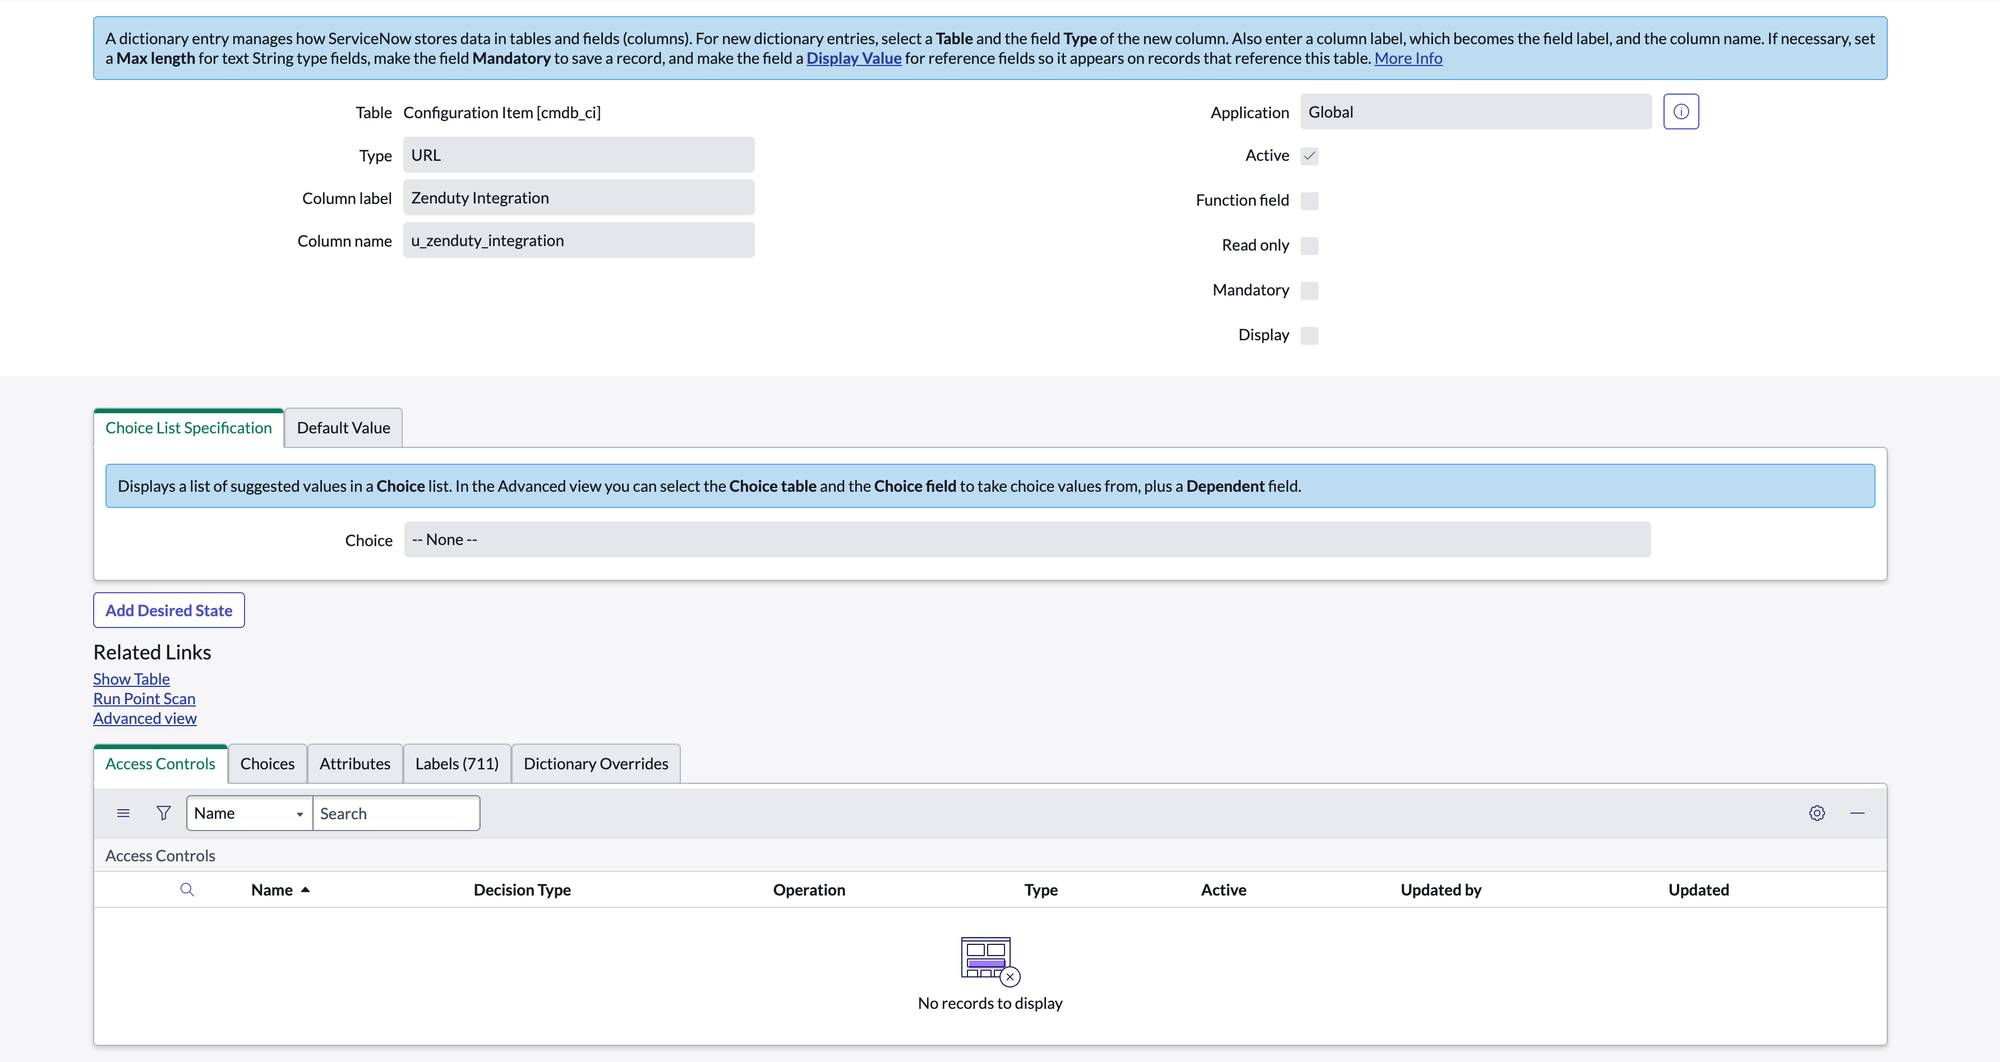
2.5 Add Custom Fields
Incident Table:
- Column label: Originated From Type: Choice, Default:
servicenow


- Column label: Zenduty Incident, Type: URL

sys_user_group Table:
- Column label: Zenduty Escalation Policy, Type: URL

cmdb_ci Table:
- Column label: Zenduty Integration , Type: URL

Install the Integration in ServiceNow
3.1 Open ServiceNow Studio
Visit:https://<your_instance>.service-now.com/$studio.do?sysparm_transaction_scope=global&sysparm_use_polaris=true
3.2 Import the App from GitHub
- Click Import from Source Control.
- Fill in:
- Network Protocol: https
- URL:
https://github.com/<your_username>/zenduty-servicenow - Credential: GitHub Integration Credential (from 2.2)
- Branch: main
- Click Import.
3.3 Configure OAuth
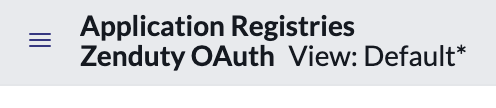
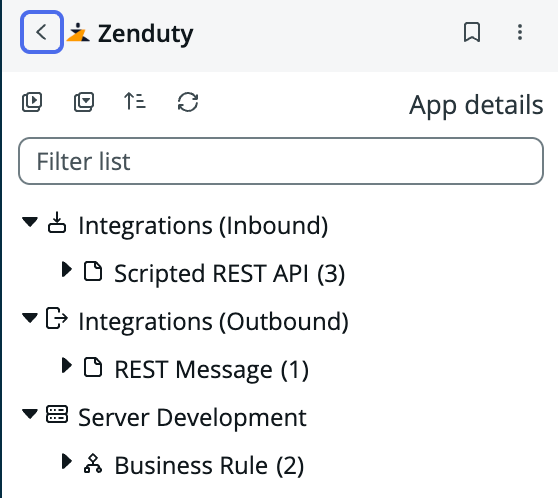
- In ServiceNow Studio, open the Zenduty application.
- Go to Application Registries → Zenduty OAuth.
- Add the field OAuth Application User to the form layout.
After clicking this you might see this

Click edit this section in Global
Add OAuth Application User to selected fields and save.
Now you will be able to see OAuth Application User in Zenduty OAuth file

- Assign this user the following roles:
oauth_adminweb_service_adminrest_serviceitil
- Copy the Client ID and Client Secret — you’ll need them shortly.
- Copy the Scope by navigating to App details.
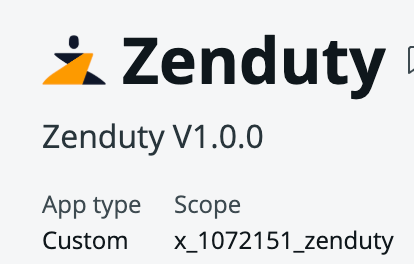
Copy only your ServiceNow instance name from the URL. It will be something like https://<ServiceNow_Instance>.service-now.com/
Connect ServiceNow to Zenduty
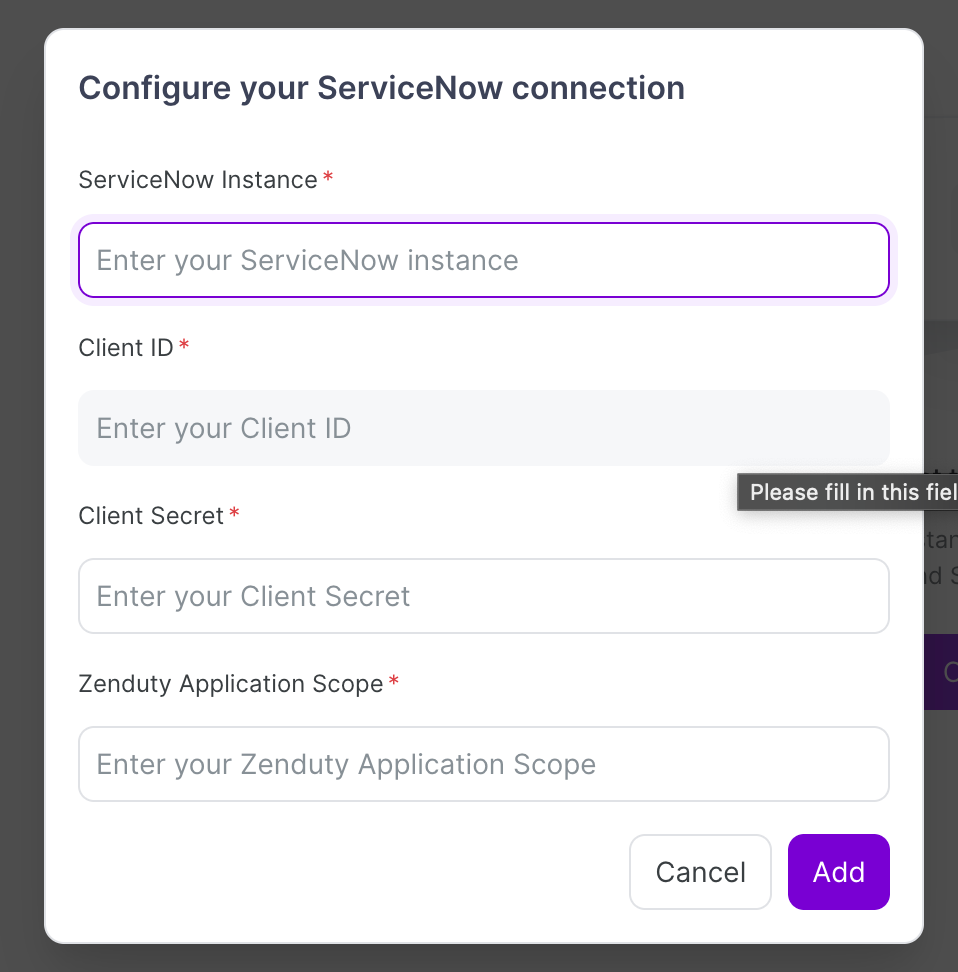
- In Zenduty, go to Profile → Account → Connections → ServiceNow.
- Click Configure.
- Fill in:
- Client ID
- Client Secret
- Scope
- ServiceNow instance name
- Click Add.
Your ServiceNow tenant is now connected to Zenduty.
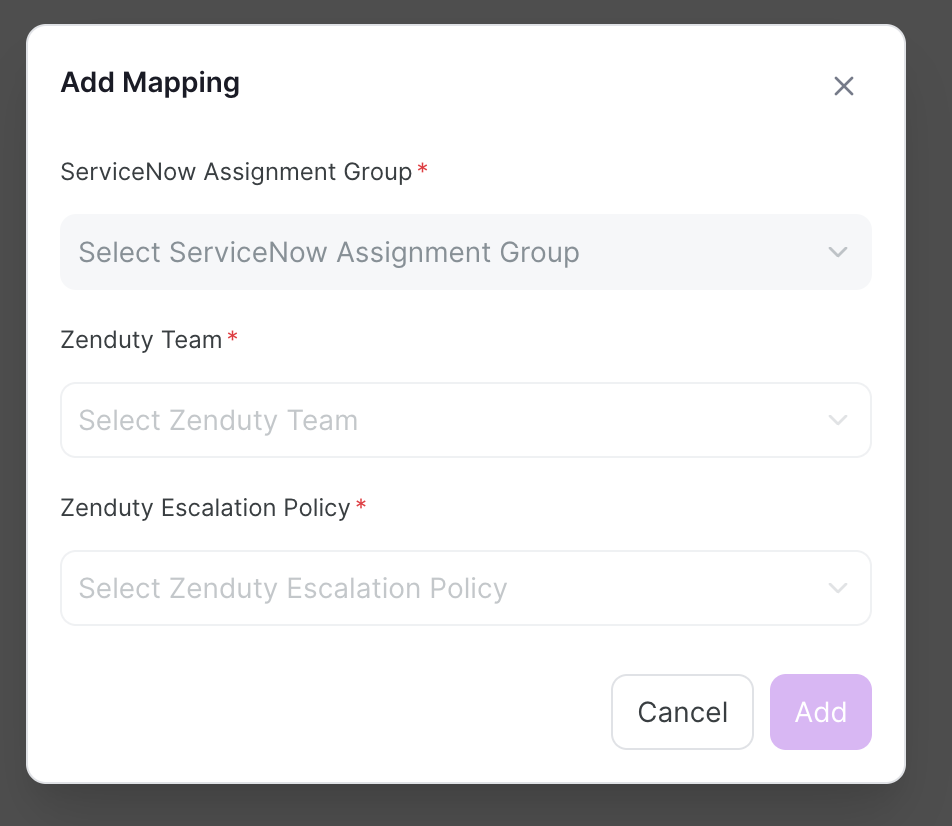
Add Escalation Policy Mapping to a ServiceNow Assignment Group
- In Zenduty, go to the ServiceNow Connections.
- Click Add Mapping.
- From the Assignment Group dropdown, select the ServiceNow group you want to map.
- From the Escalation Policy dropdown, choose the Zenduty escalation policy you want linked to that group.
- Click Add Mapping to save your changes.

Set Up Mappings & Outgoing Integration
- In Zenduty, map Escalation Policies to ServiceNow Assignment Groups.
- Go to: Teams → [Your Team] → Services → [Service] → Add Outgoing Integration.
- Search for ServiceNow → Add Integration.
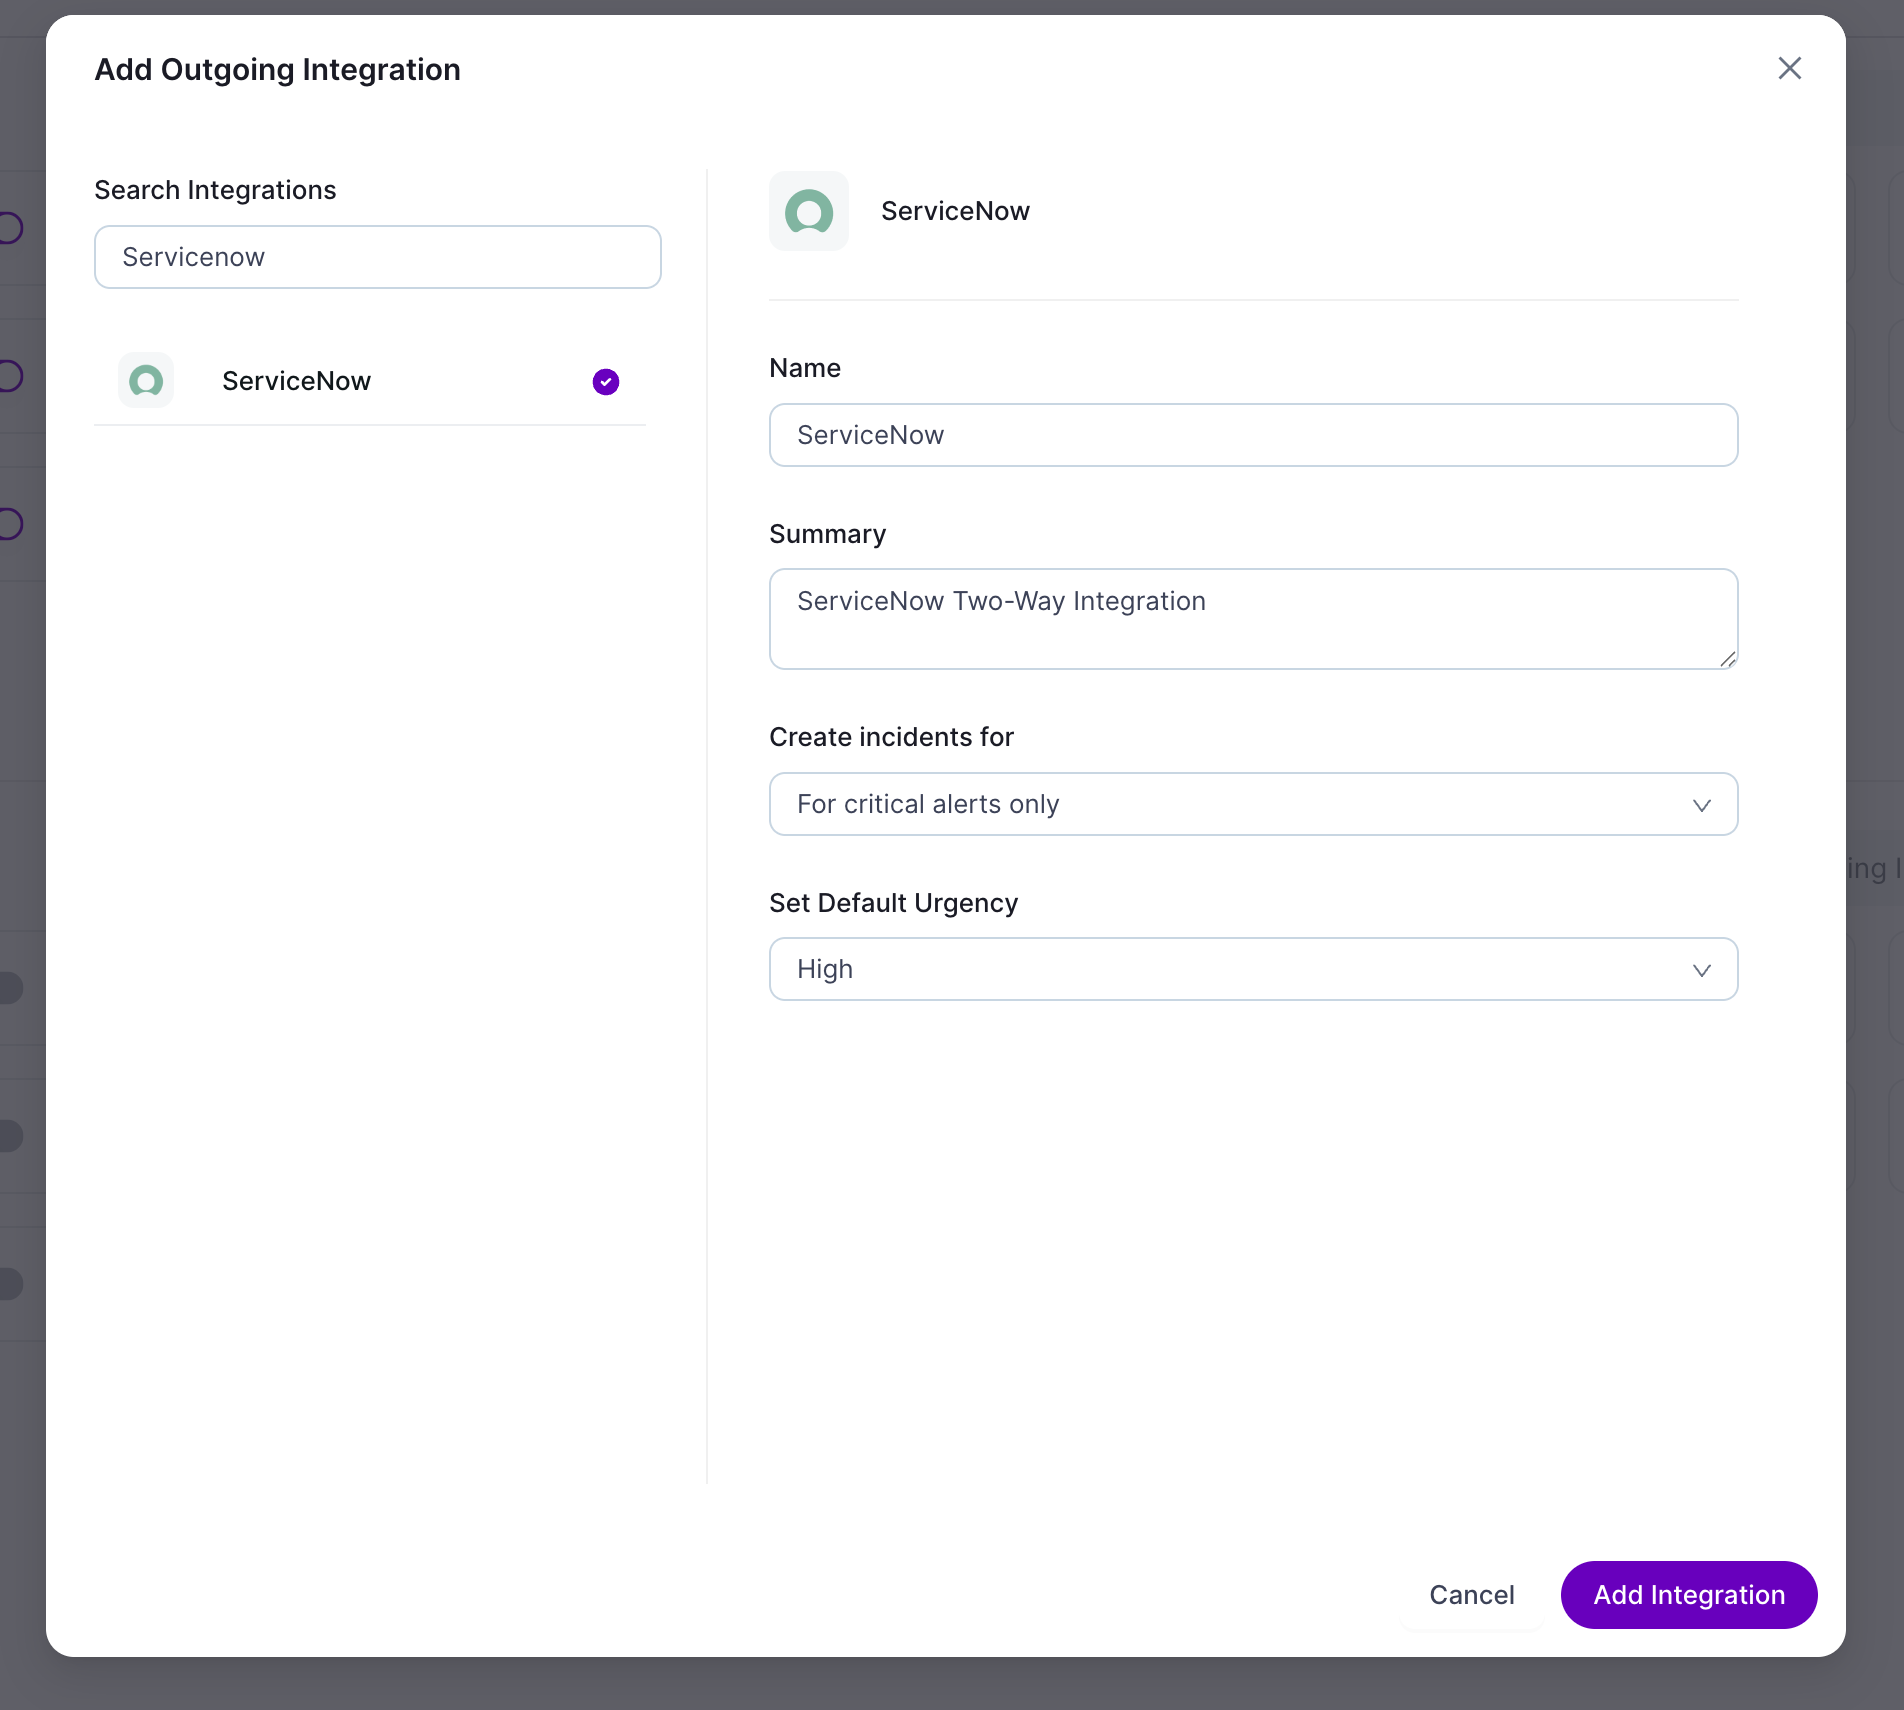
Configure:
Mapping Type: OR (either condition triggers) or AND (both required)
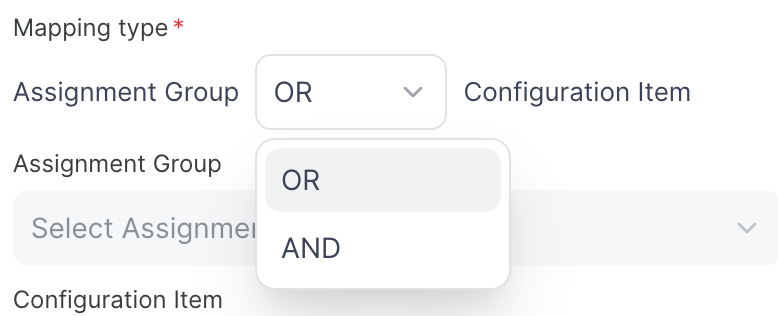
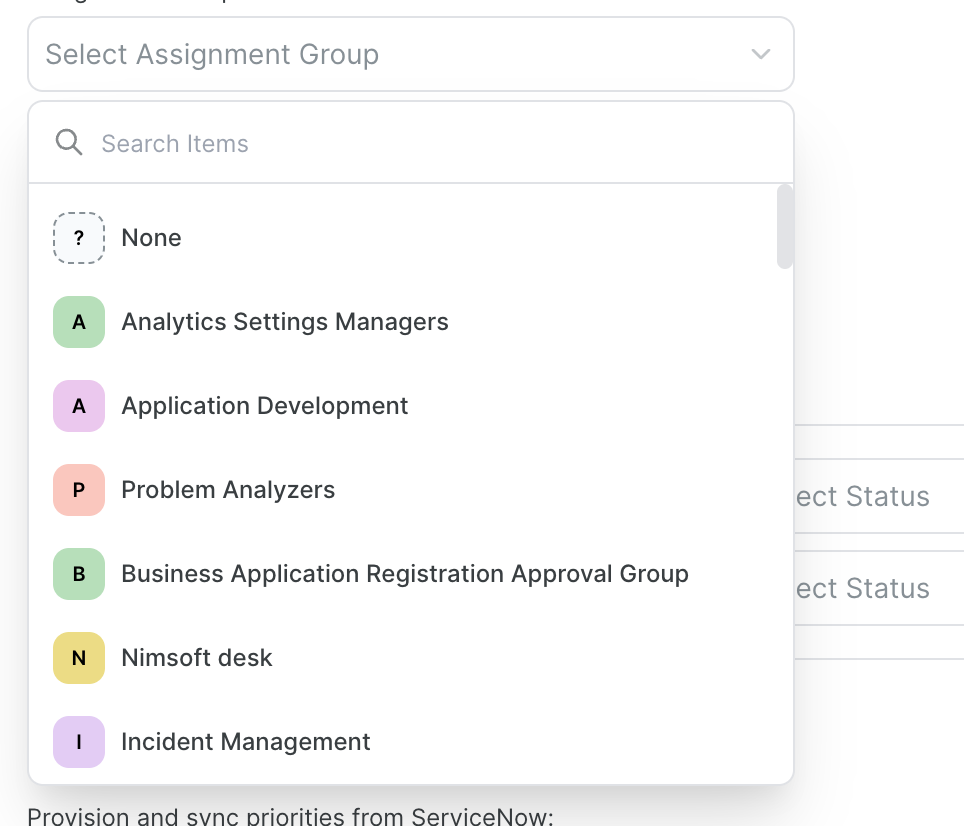
Assignment Group and/or Configuration Item
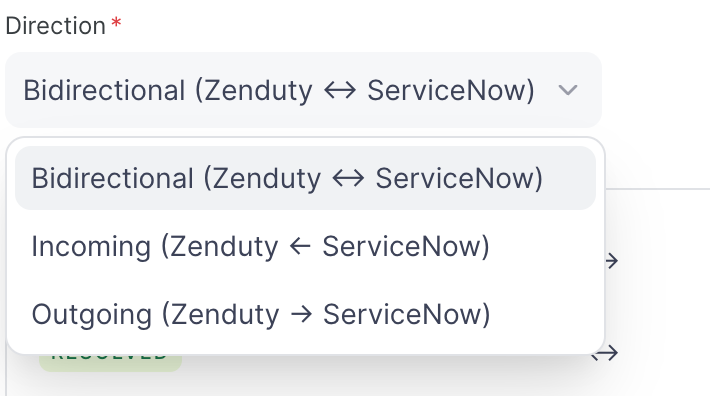
Direction (one-way or two-way)
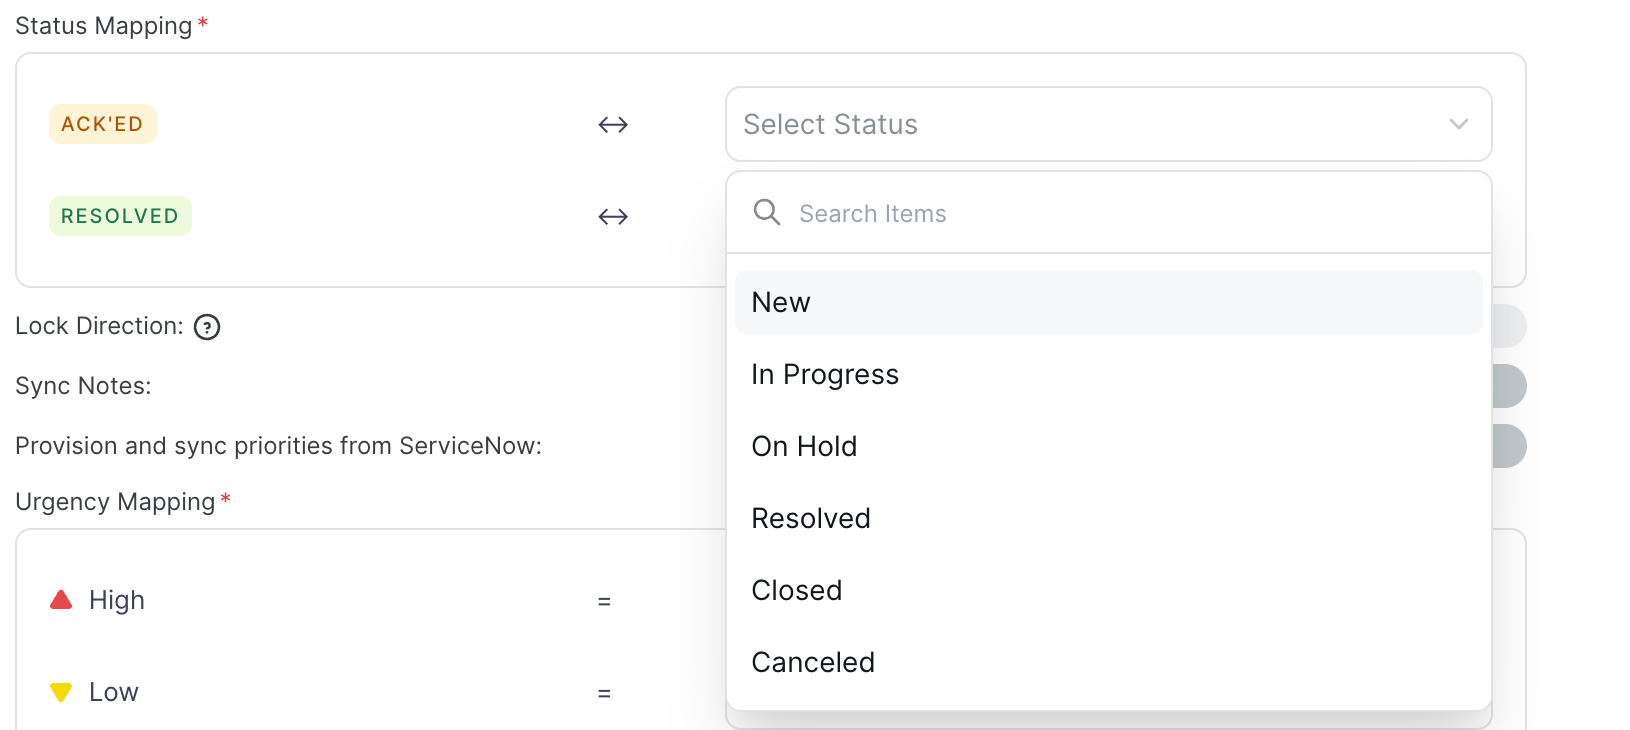
Status mapping
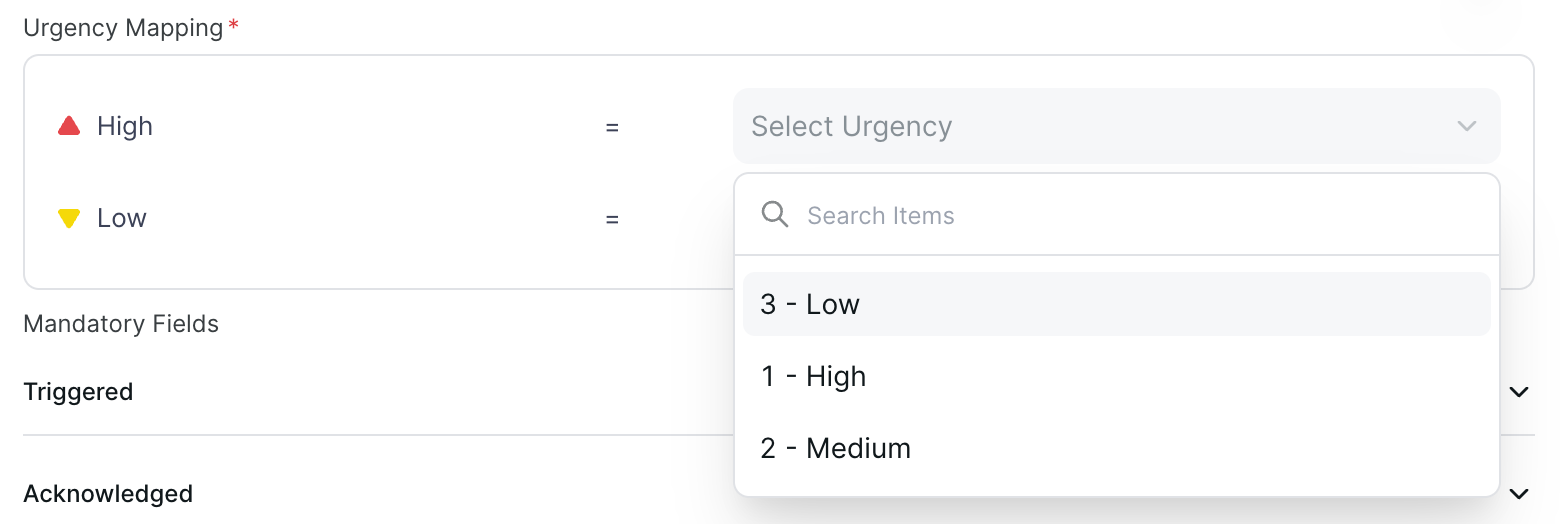
Urgency mapping
Note & Priority syncing

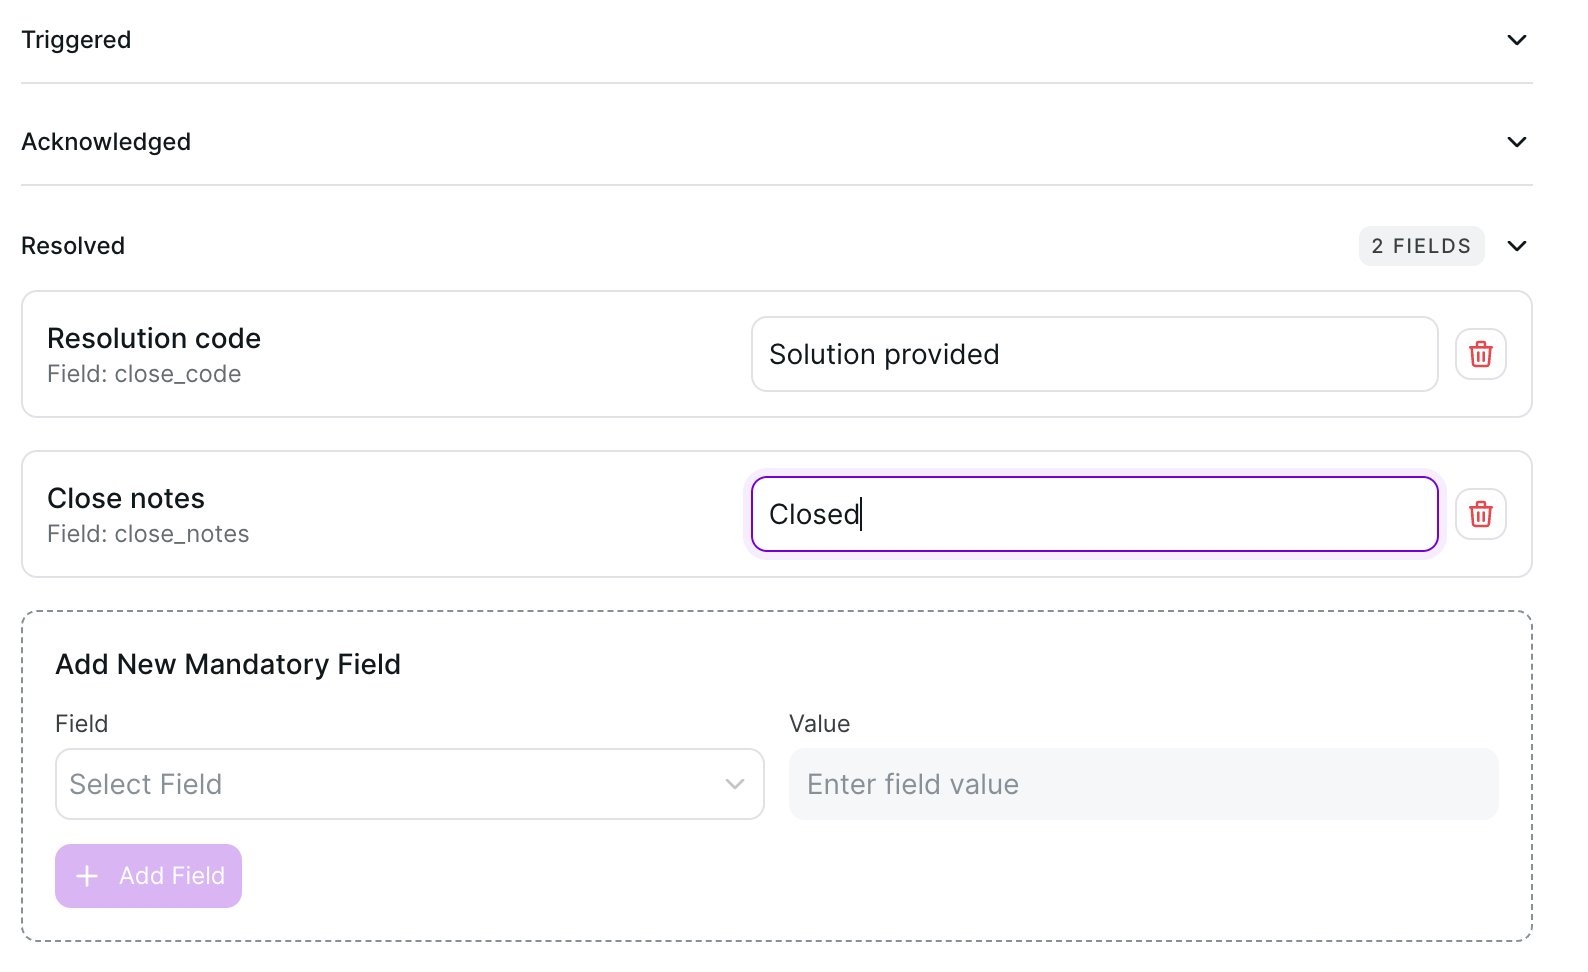
Mandatory fields for acknowledge/resolve actions
Click Save.
✅ Done — Zenduty and ServiceNow now exchange incidents in real time.