Zoho Desk Integration Guide
Zoho Desk is a web-based help desk software that helps businesses manage customer support operations and provide better customer service. It allows businesses to manage tickets, track customer interactions, and offer multi-channel support, ultimately aiming to enhance customer experience and agent productivity.
What can this Zenduty integration do for Zoho Desk users?
With Zoho Desk's Integration, Zenduty sends new Zoho Desk ticket alerts to the right team and notifies them based on on-call schedules via email, text messages(SMS), phone calls(Voice), Slack, Microsoft Teams and iOS & Android push notifications, and escalates alerts until the alert is acknowledged or closed. Zenduty provides your NOC, SRE and application engineers with detailed context around the Zoho Desk Ticket issue alert along with playbooks and a complete incident command framework to triage, remediate and resolve incidents with speed.
Whenever a Zoho Desk ticket is generated, an alert is sent to Zenduty, creating an incident. When that ticket is closed, Zenduty will auto-resolve the incident.
You can also use Alert Rules to custom route specific Zoho Desk ticket alerts to specific users, teams or escalation policies, write suppression rules, auto add notes, responders and incident tasks
To integrate Zoho Desk with Zenduty, complete the following steps:
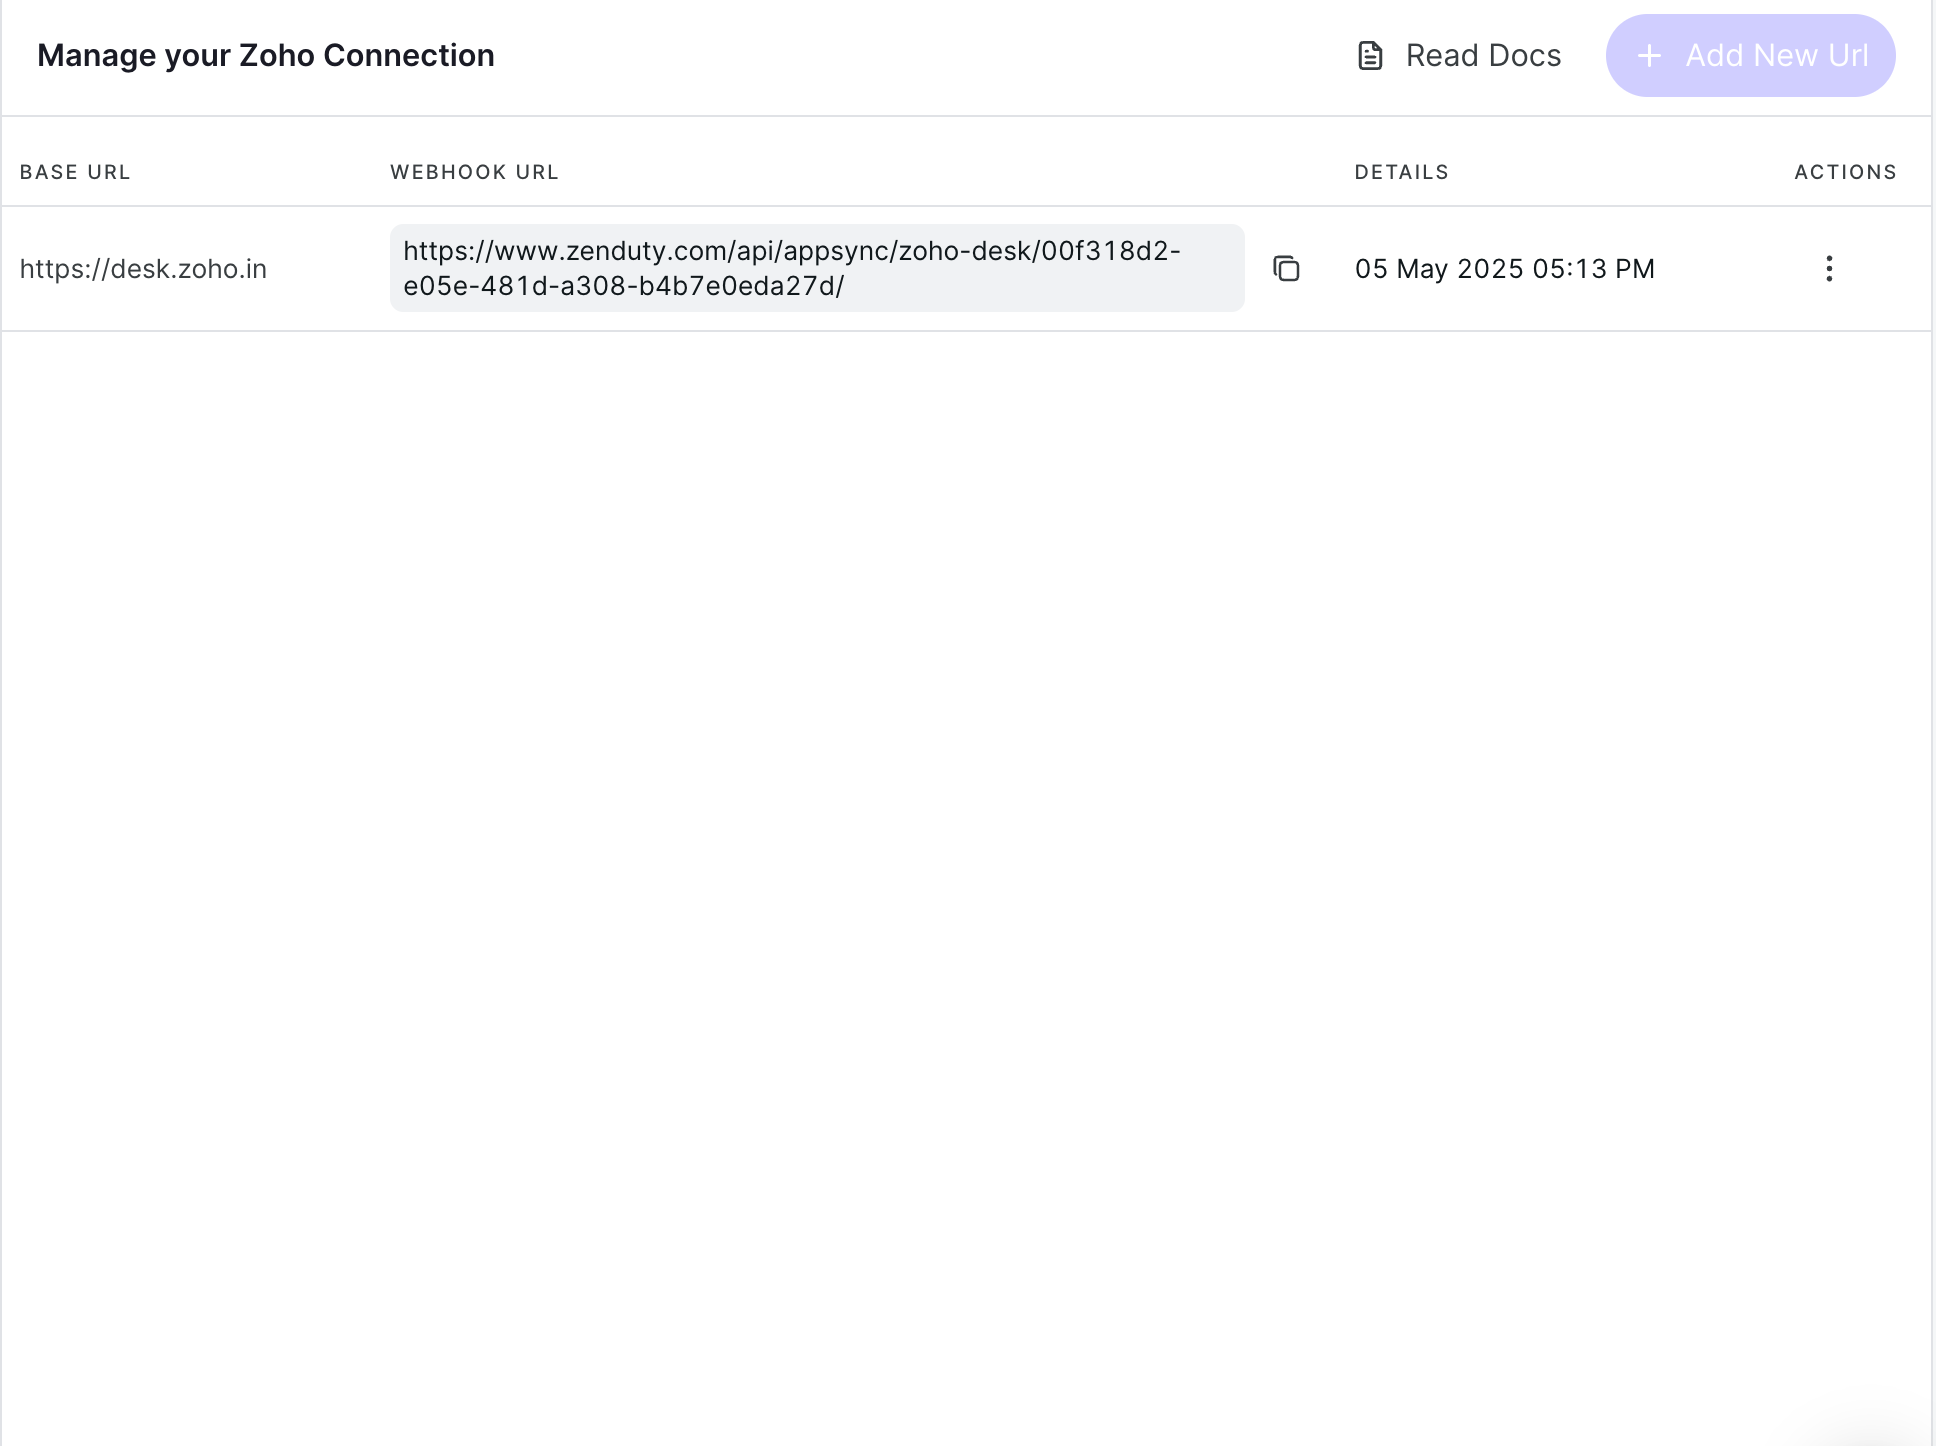
In Zenduty(Account Settings):
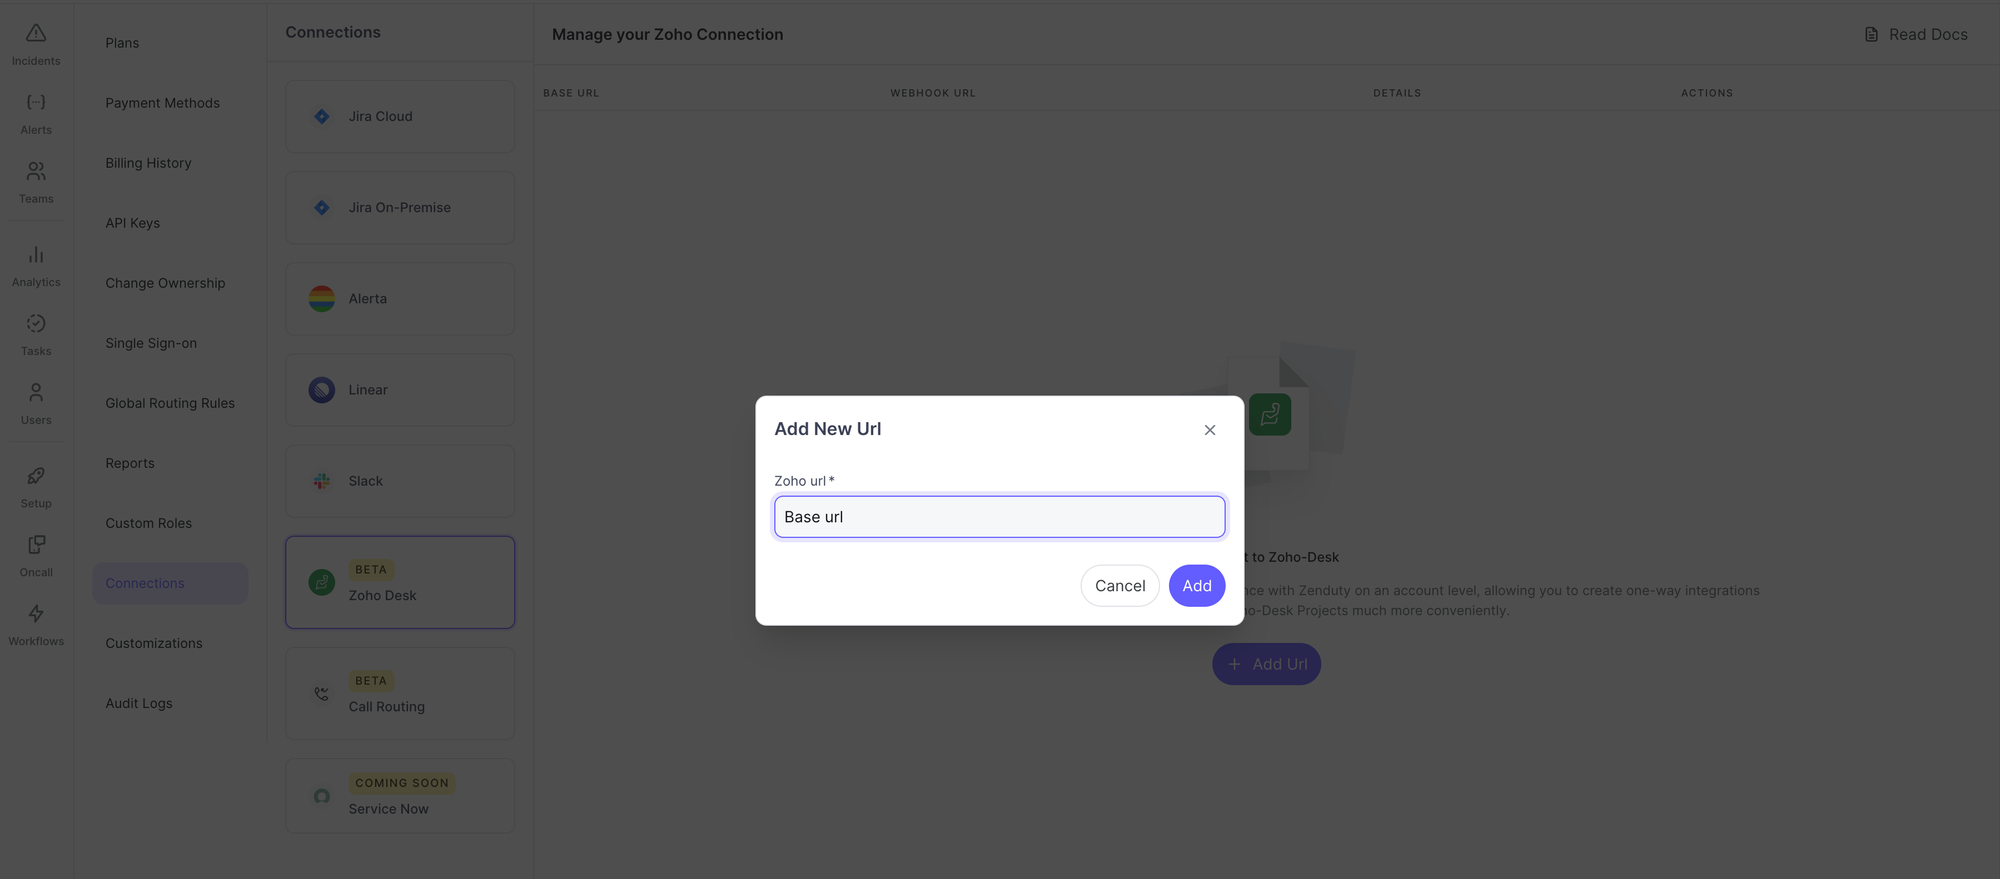
- Navigate to Account Settings → Connections.
- Select Zoho Desk, then click Add Url.
- Enter the Base URL of your Zoho Desk account, specific to your country.
Note: Please refer to the Outbound Communication Guidelines document for the correct URL structure. - Click Save.
- After saving, you will see the WEBHOOK URL.Copy and save this URL to use it in Zoho Desk.
Note
- Base url example
https://desk.zoho.in/for India
In Zoho Desk
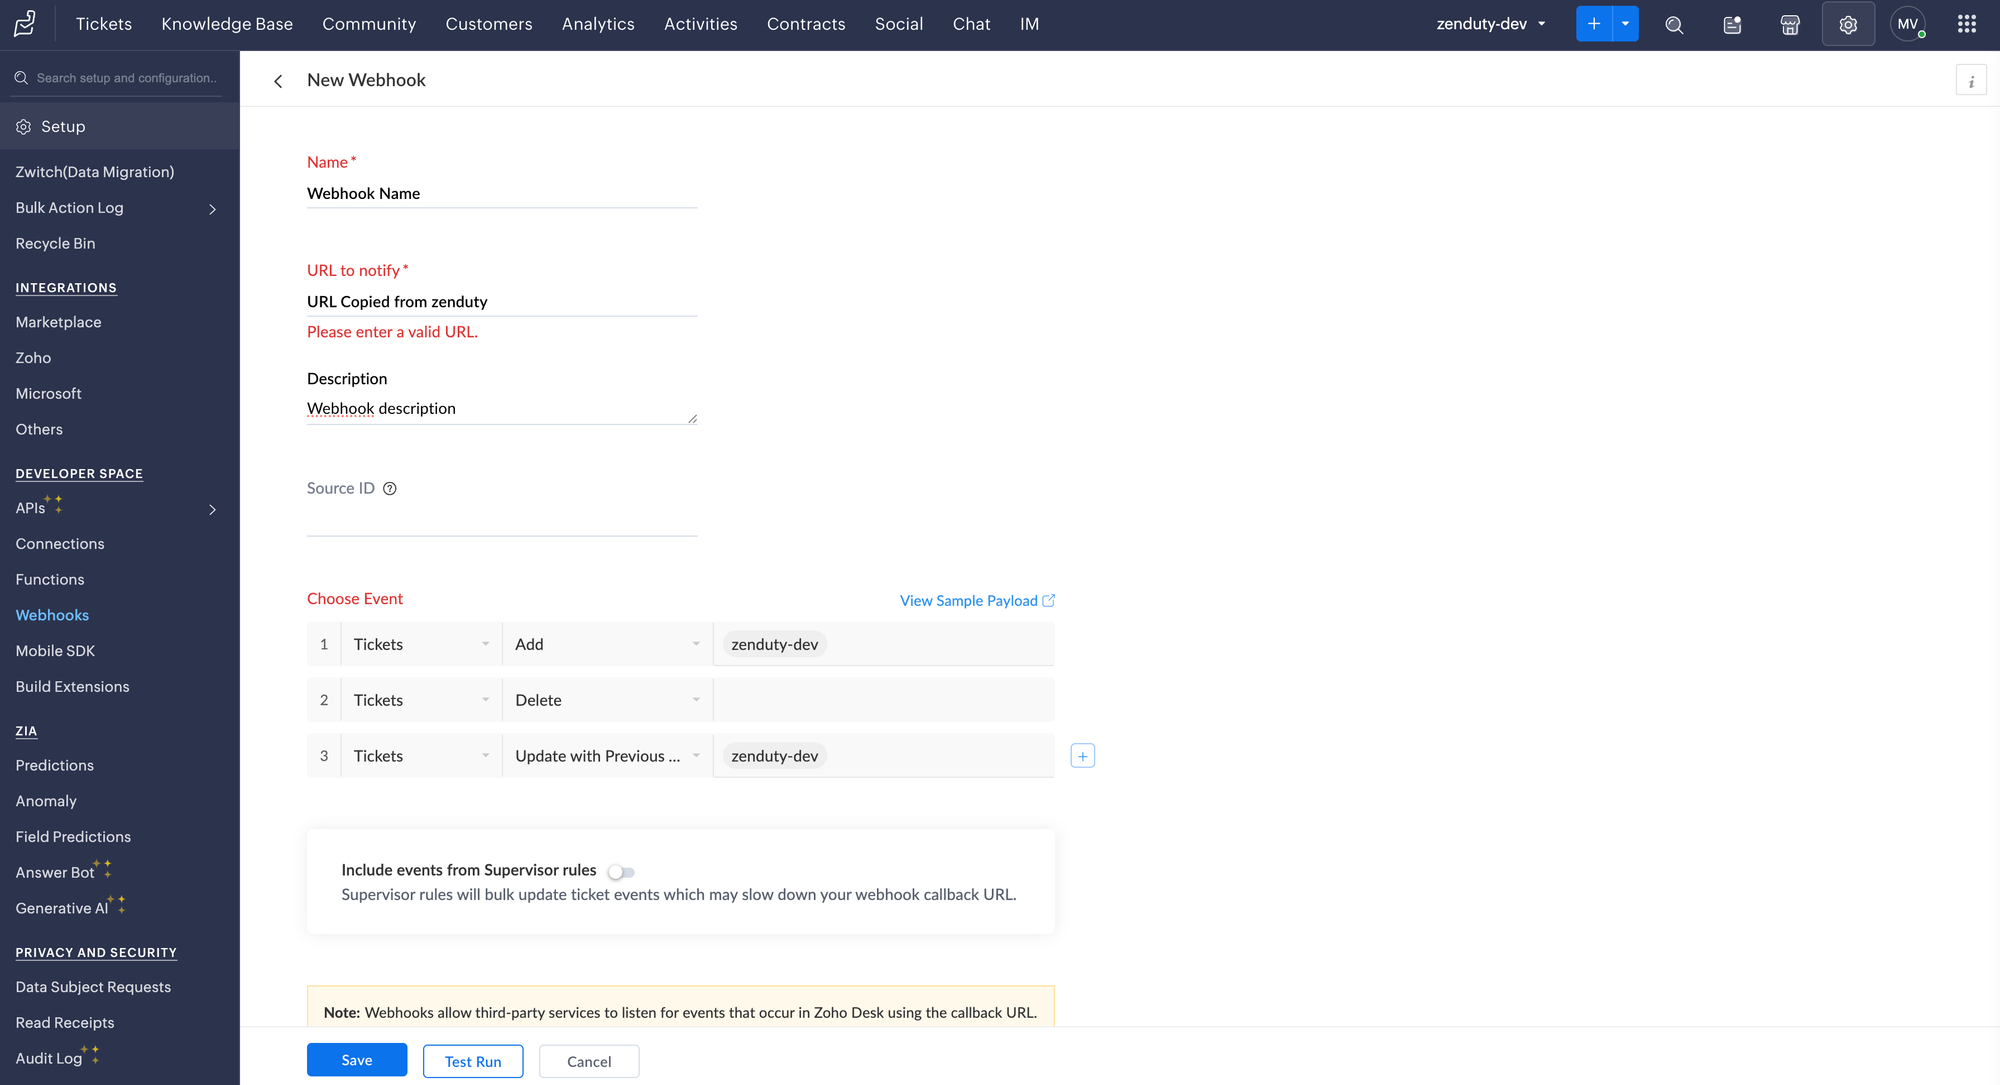
- Login to Zoho Desk.
- Navigate to Setup by clicking the gear icon located at the top right of the screen. In the Setup menu, under Developer Space, select Webhooks.
- Click on New Webhook. You will be prompted to enter the Webhook URL and other details. Paste the copied webhook URL from Zenduty. Then, choose the events for which the webhook should be triggered.
- Currently, only the following three events are supported: Ticket Add, Ticket Update, and Ticket Delete.
- After selecting the events, you can optionally choose a specific Department if you want the webhook to apply only to that department. By default, the webhook will be triggered for all departments if no specific department is selected.
- Click Save to complete the configuration.
Setting Up Integration
In Zoho Desk
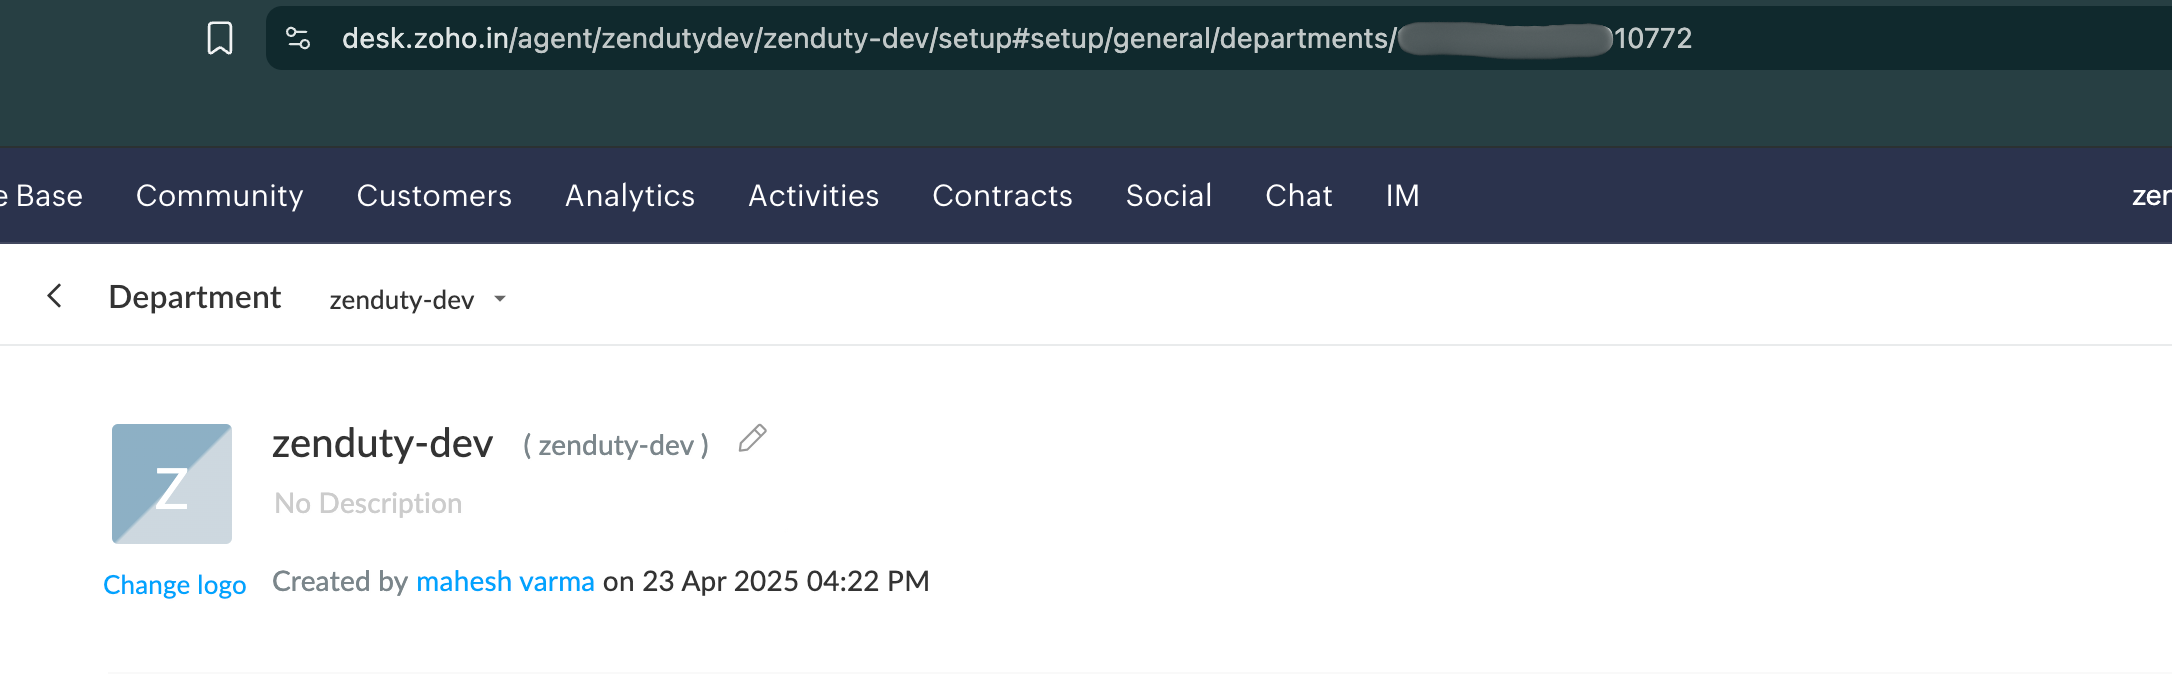
- Navigate to Setup by clicking the gear icon at the top right of the screen.
- Under the Organization section, select Departments.
- Click on the department you want to set up for the integration.
- In the URL of the page, you'll see a number after
departments/— this is the Department ID. - Copy this number and save it for use in the integration configuration.
In Zenduty
- In Zenduty, navigate to Teams and select the team for which you want to create the integration.
- Under the selected team, go to Services.
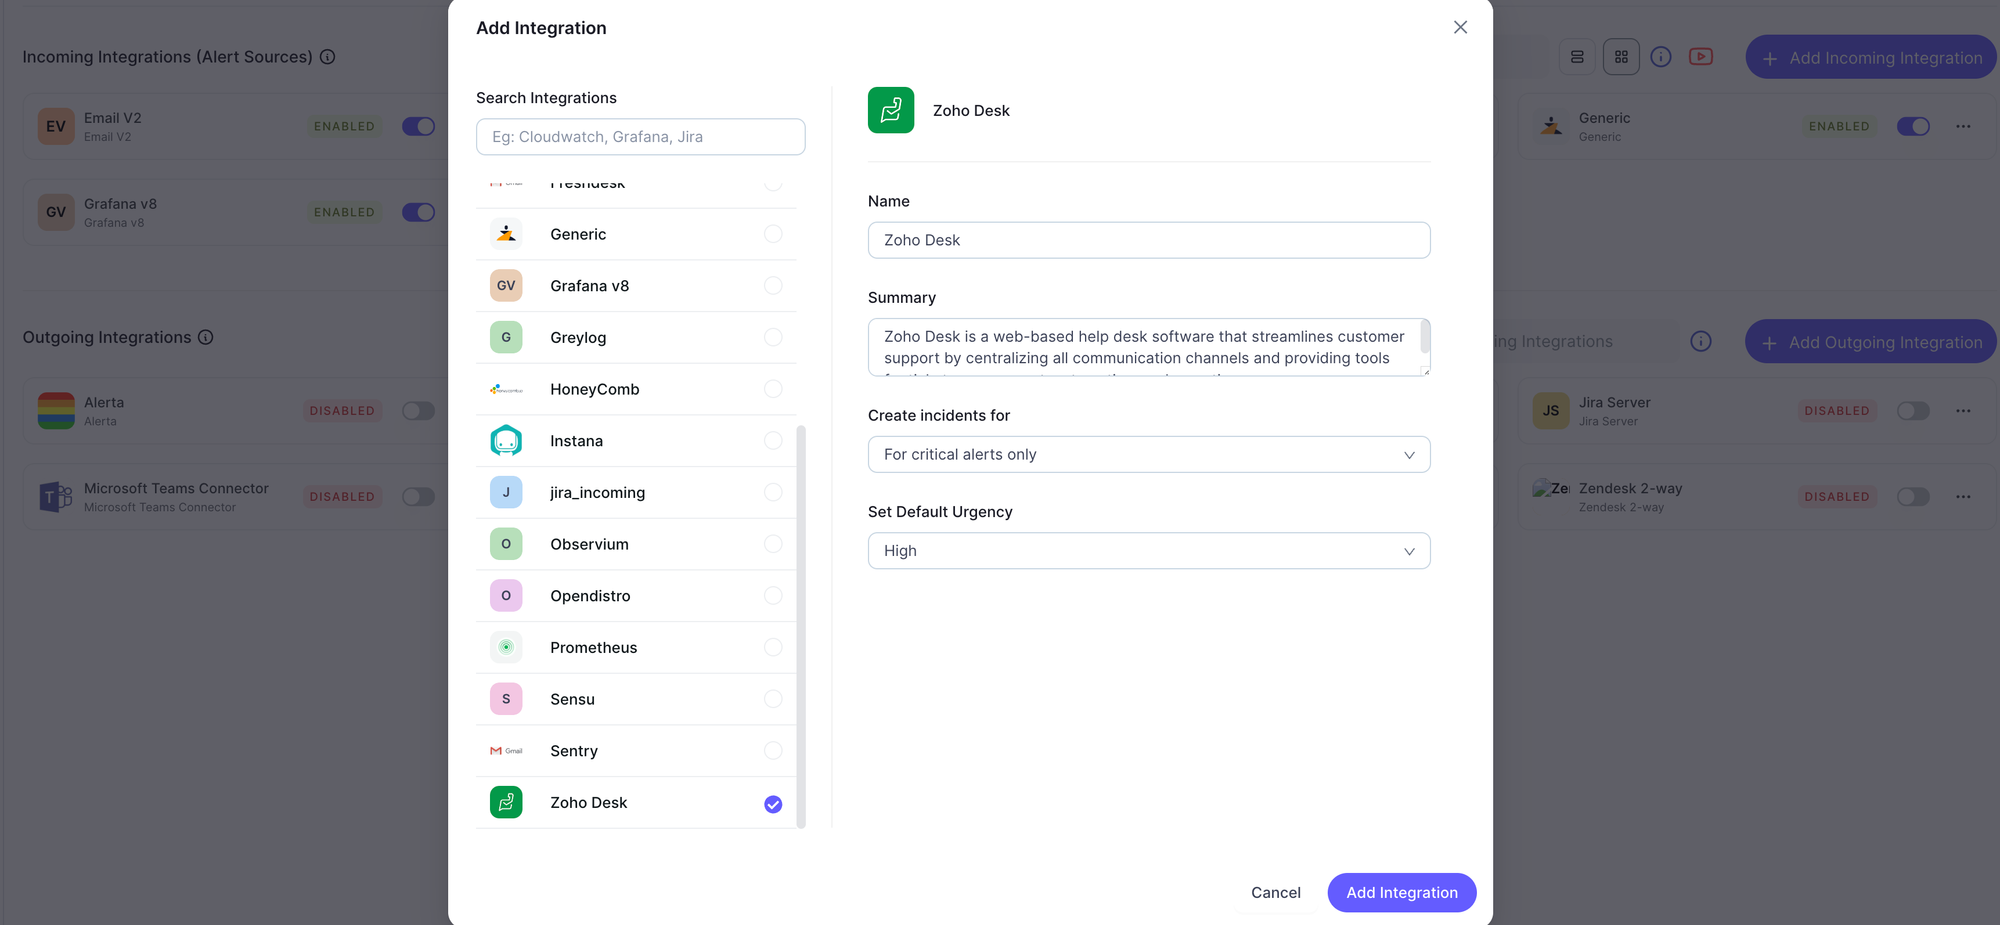
- Choose the service you want to integrate with, then click on Add Incoming Integration.
- From the list of available integrations, select Zoho Desk.
- Choose the case in which you want Zenduty to create an incident and set the default urgency.
- After setting the urgency, click Add Integration.
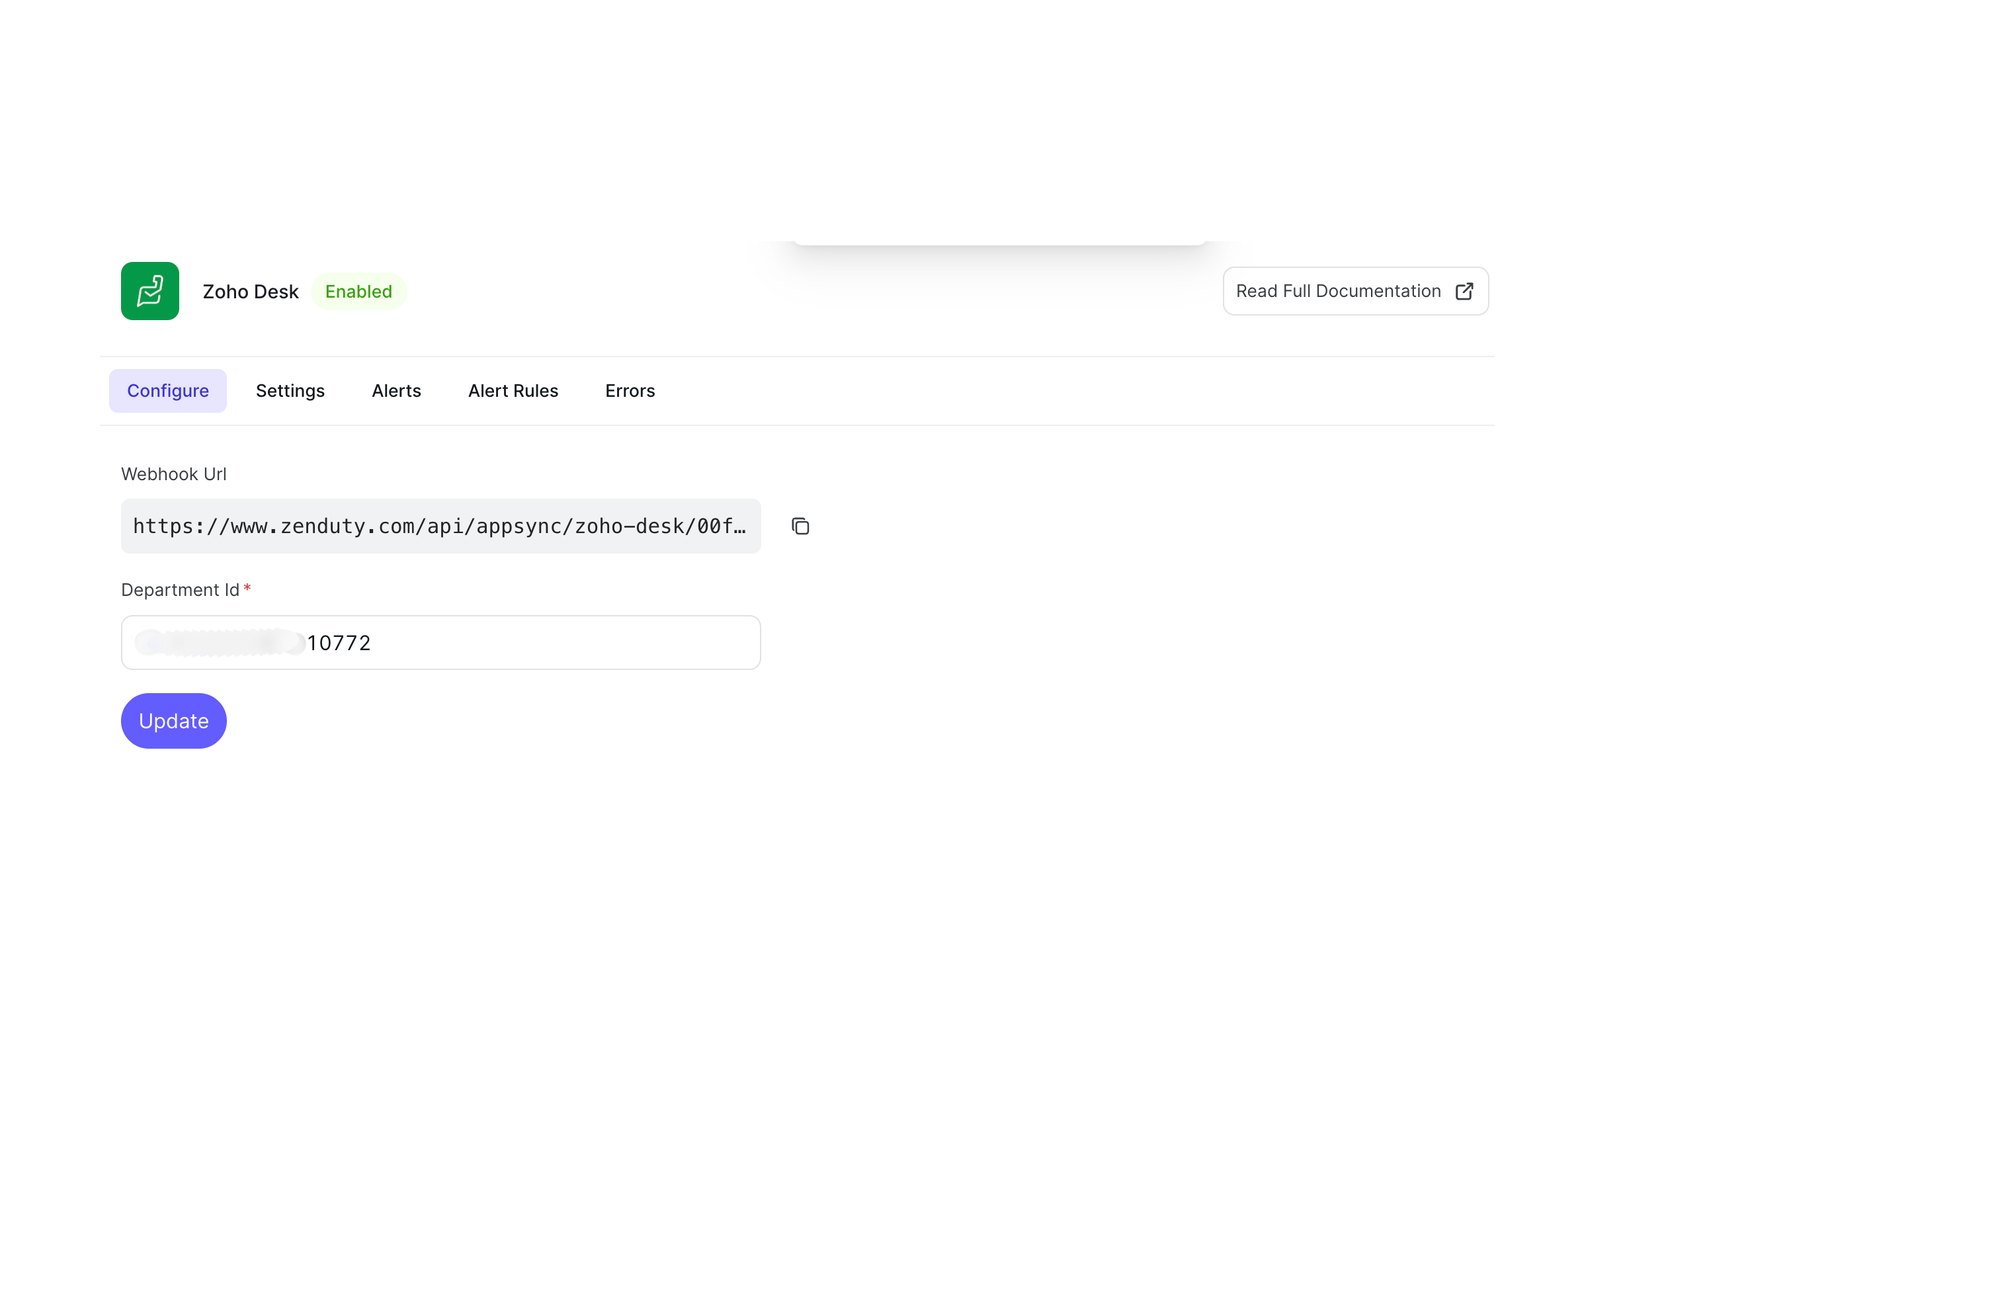
- You will be redirected to the Configure Integration page.
- On this page, you will see your Webhook URL and a field to enter the Department ID.
- Paste the Department ID you copied earlier from Zoho Desk into the appropriate field.
- Click Save to complete the integration setup.